
Tank Abandonment
aka (Tank Closure in Place)

Look its fairly common knowledge for anyone with internet access that an oil tank is a risk, as it is a vessel that holds oil, it can rust (it will rust), oil can leak and whoever owns the property has to cleanup the oil leak. That is the long and short of liability with oil tanks, Rust Never Sleeps, what does sleep is people's concern regarding an oil tank. Unless a problem is staring most people in the face, a problem can largely go ignored. Hey if an old roof leaks, you fix it.

So the general advice is if you have an older oil tank (lets ay a tank that is out of warranty and thus at risk of leaking) should be removed and tested at that time to confirm the tank didn't leak. So when you do the right thing with an oil tank you actually do 2 things. 1 you clean the tank and either remove it or fill it in place, buy doing either you are making sure the tank is never able to hold oil again. 2 you test the soil under the tank to prove it didn't leak. When you remove the tank its easier as you are bragging soil samples from an open excavation. But what if removing the tank is not feasible or more expensive, like when its under a structure a deck a public sidewalk, you get the idea. Well you spend the extra 30 minutes and cut holes in the tank to obtain your confirmatory soil samples, again to prove it didn't leak. In both situations if your samples are clean you get a report that the tank didn't leak (either a removed tank or a filled in place).
Every tank removed or filled in place needs documentation, which includes laboratory testing and a statement from the company who did the tank work that the tank did not leak.
This is SOP for tanks in Delaware, tanks in New Jersey and tanks in Pennsylvania, those are the 3 states we work in. I am confident it is also SOP in other states but without licensing in those states, we cannot say 100%, but likely its accurate to 98%.
To be clear Curren recommends that in all cases where it is feasible, the underground storage tank be removed. While this approach is recommended, we know from experience that removal is not always feasible. Tanks can be located under decks, beneath patios, in basements, crawl spaces and beneath additions. In general, some tanks were buried without regard to having the tank removed in the future. You may also find that utilities were placed on top of or across the tank. Natural gas lines are very common to run on top of or adjacent to buried tanks. In certain cases, tank removal is prohibitive (expensive). In these cases, a tank closure in place is the preferred option.

Remember the most important question regarding any petroleum storage tank is if it leaked. You answer that question by obtaining soil samples after the tank is cleaned. You can either sample the ground after you remove the tank or when a tank is closed in place you cut holes
Petroleum storage tanks once cleaned can be filled with an inert material, such as sand, concrete slurry or foam. Once a tank is cut opened and cleaned it is technically no longer a tank as it can no longer securely store liquid contents. Also by cleaning the tank, as per API standards (American Petroleum Institute) you are removing the possibility of the tank ever leaking. Remember the most important question about any tank is if it leaked.

The same limitations that can prevent a tank from being removed can also physically hinder the ability to fill a tank with an inert material. The standard ratio of up to five (5) cubic yards of material are required per 1,000 gallons of storage tank capacity. If a tank is located in a physically inaccessible location, the ability to fill the tank with either concrete or sand may be logistically not possible or prohibitively expensive. In these instances foam filling the tank is the most practical option.
Questions?
Environmental Managers are available Monday to Friday from 8:00am to 5:00 pm EST.

The procedures followed to foam fill a tank are as follows:
Step 1: Local Permits
Before any tank closure work can be performed; a permit to abandon the underground tank will be obtained from the local municipality, fire department, health department, or other applicable agency.
Step 2: Excavation
As required by law, Curren will notify the applicable state "ONE CALL SYSTEM" to obtain a utility mark out at the subject site. Once notified, if there are public utilities in the area of excavation, the utilities will mark their lines. All on-site work will proceed after all utilities have been marked.

Step 3: Liquid Disposal
Upon arrival to the site and prior to excavation all pumpable liquid product will be removed from the tank and lines. After removal of the tank pumpable liquids, overburden soils will be excavated to expose the top portion of the tank
Step 4: Tank Cleaning
Uncover the top portion of the tank, cut a hole in the tank. After the tank has been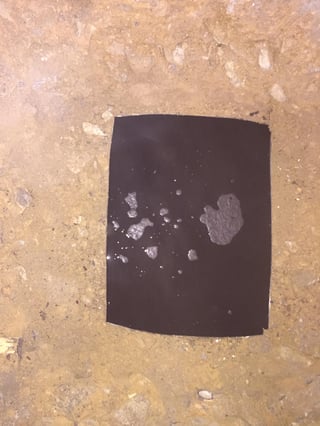 exposed and all the liquids removed, the tank will be purged of petroleum vapors. Continuous atmosphere monitoring of the tank will be performed for flammable vapors and Oxygen content. If no flammable vapors are present and the tank contains sufficient Oxygen, the tank will be entered and cleaned. American Petroleum Institute Publication 2015, "Cleaning Petroleum Storage Tanks," procedures will be followed throughout this phase of the project. Tank cleaning will consist of wiping, squeegeeing, and removing all liquids and sludge from the tank. All liquids and sludge generated as a result of the tank cleaning process will be placed into a vacuum truck and transported off the site under a bill of lading.
Step 5 Soil Sampling
What does everyone want to know about an oil tank> People want to know if they tank leaked. Leaking tanks cost money to cleanup. The way you know a tank did not leak is by obtaining soil sampling. When a tank is being abandoned in place, how do you obtain soil samples from below a steel tank?
You can cut holes or the industry term cut coupons in the bottom of the tank so you can access soils below the tank and obtain your samples. This practice has been followed for over 20 years, the problem is many tank never had the testing performed when the tank was filled in place. These cases dictate that you reverse engineer the prior tank removal by removing all the prior fill installed, you reclean the tank, cut coupons and obtain soil samples.

Step 5: Tank Filling
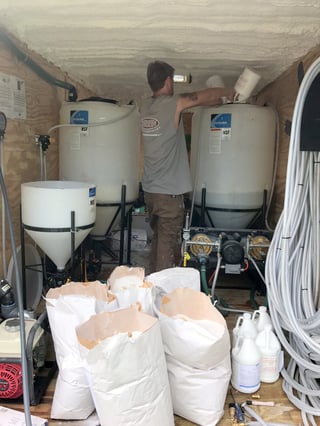
After the tank has been cleaned and inspected by the local official; the tank can be filled with an inert clean material including sand, concrete slurry or foam. Each has its advantages. Pertaining to foam filling, foam tends to be able to be installed in a tank when access is an issue and when future removal maybe a possibility foam is white in color and is classified as an inert nonflammable material. The foam is mixed on site to the quantity needed to fill the tank void (volume). The photo below shows one of Curren's foam trailers.
The foam is installed utilizing a wand similar to a power washer wand. The hose utilized to transfer the foam can be snaked several hundred feet around corners and down stairs to the tank location.
Foam has superior advantages to reach areas where sand or concrete cannot.
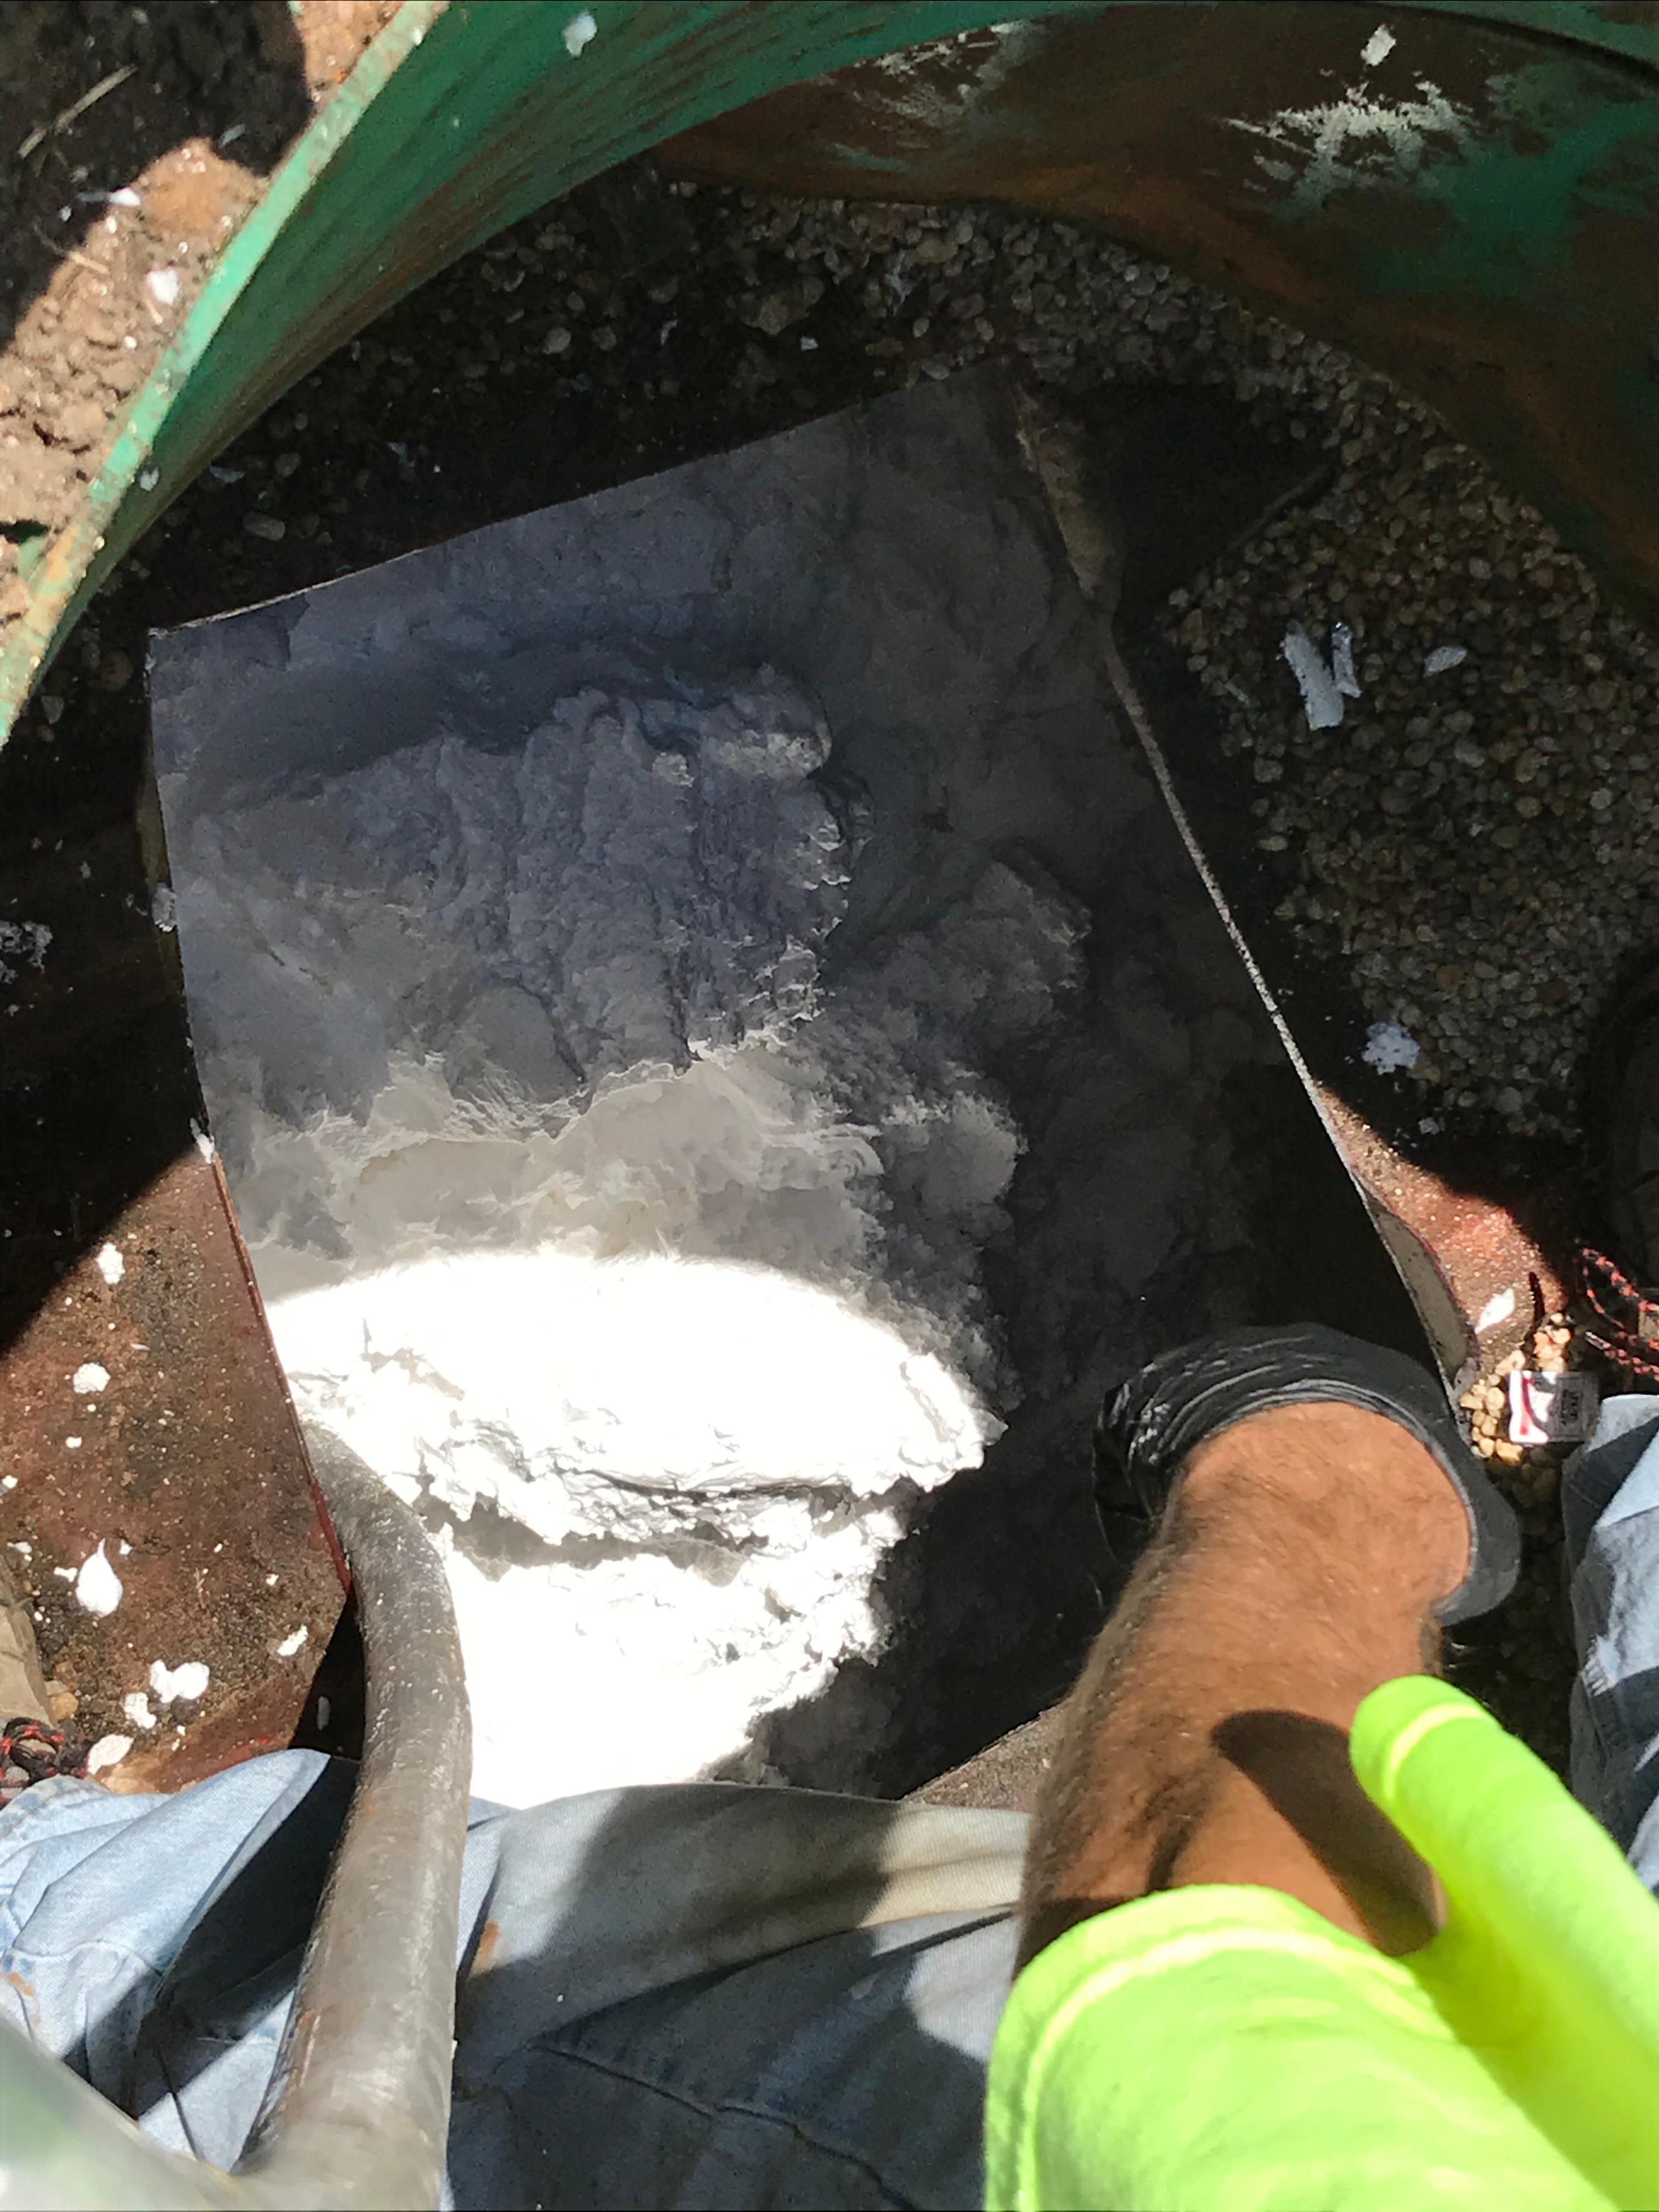
Concrete slurry can also be used, as seen in the following photo:


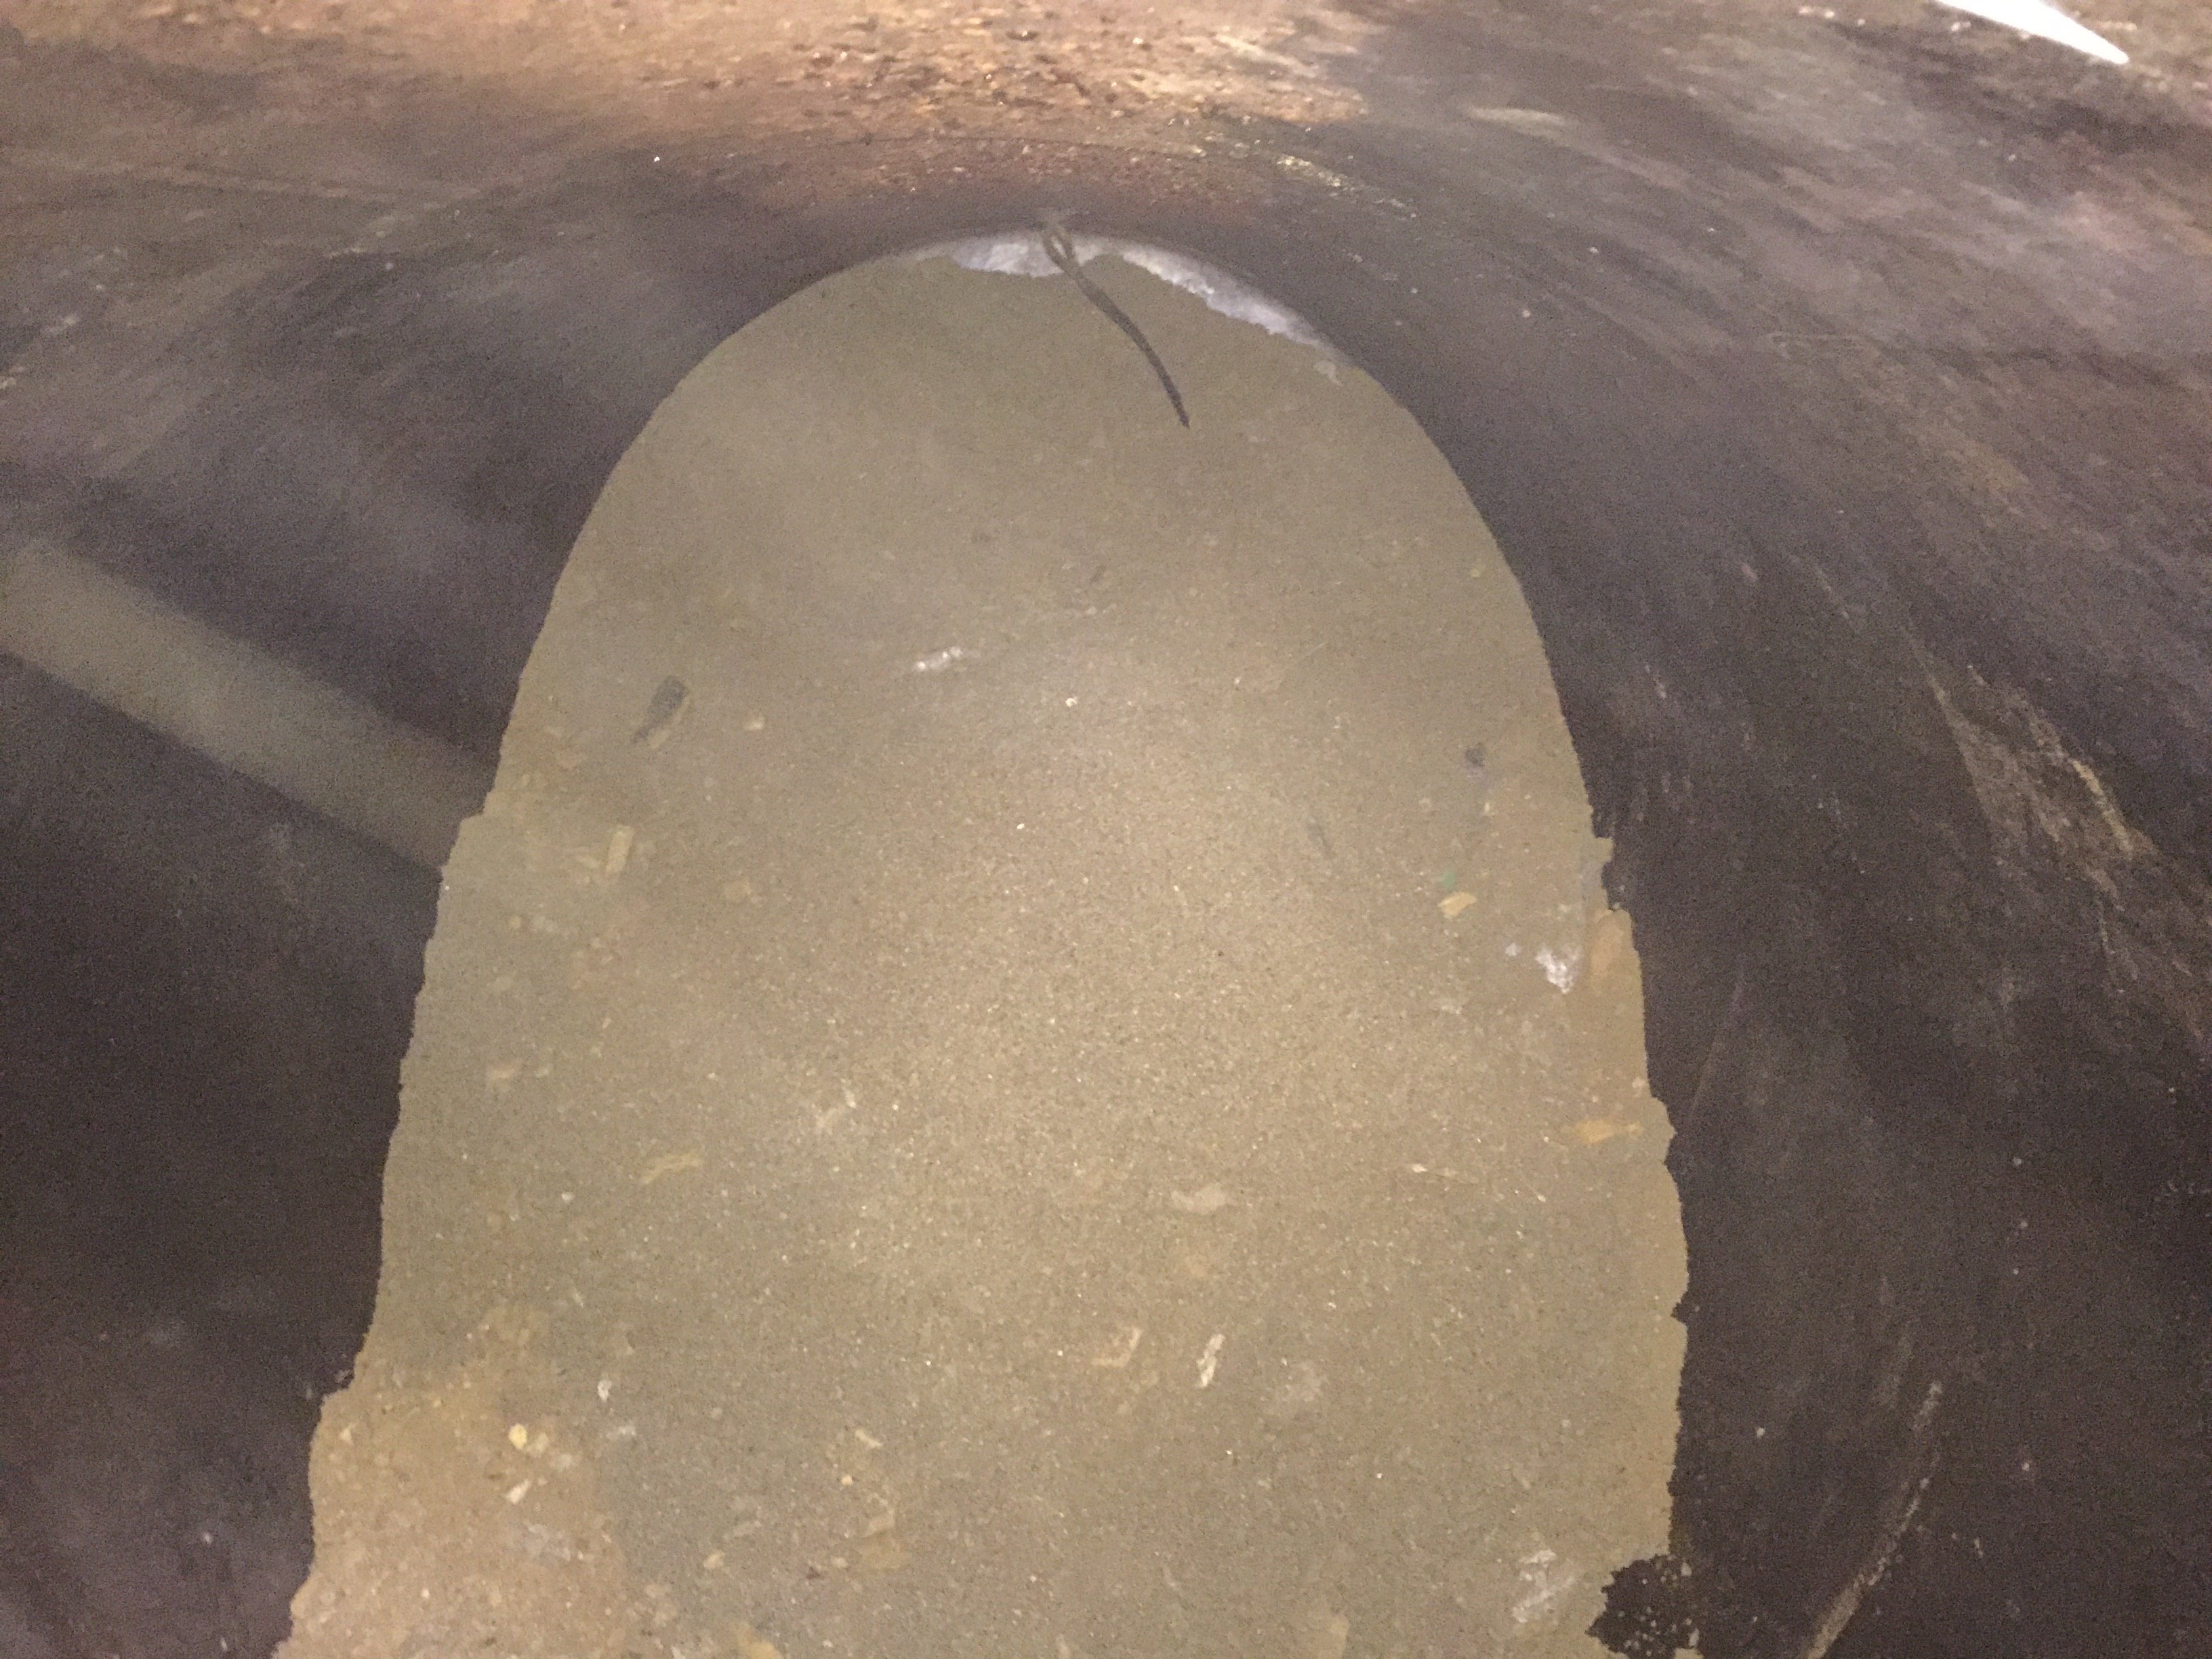
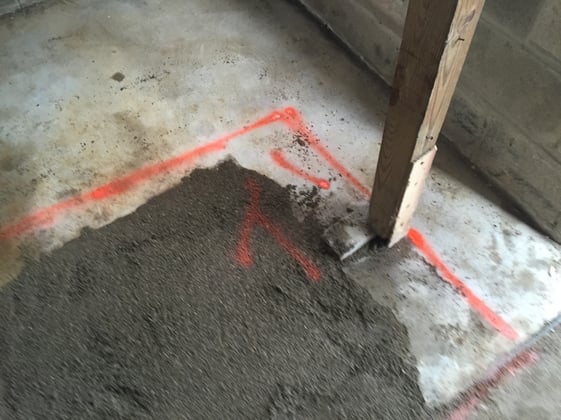
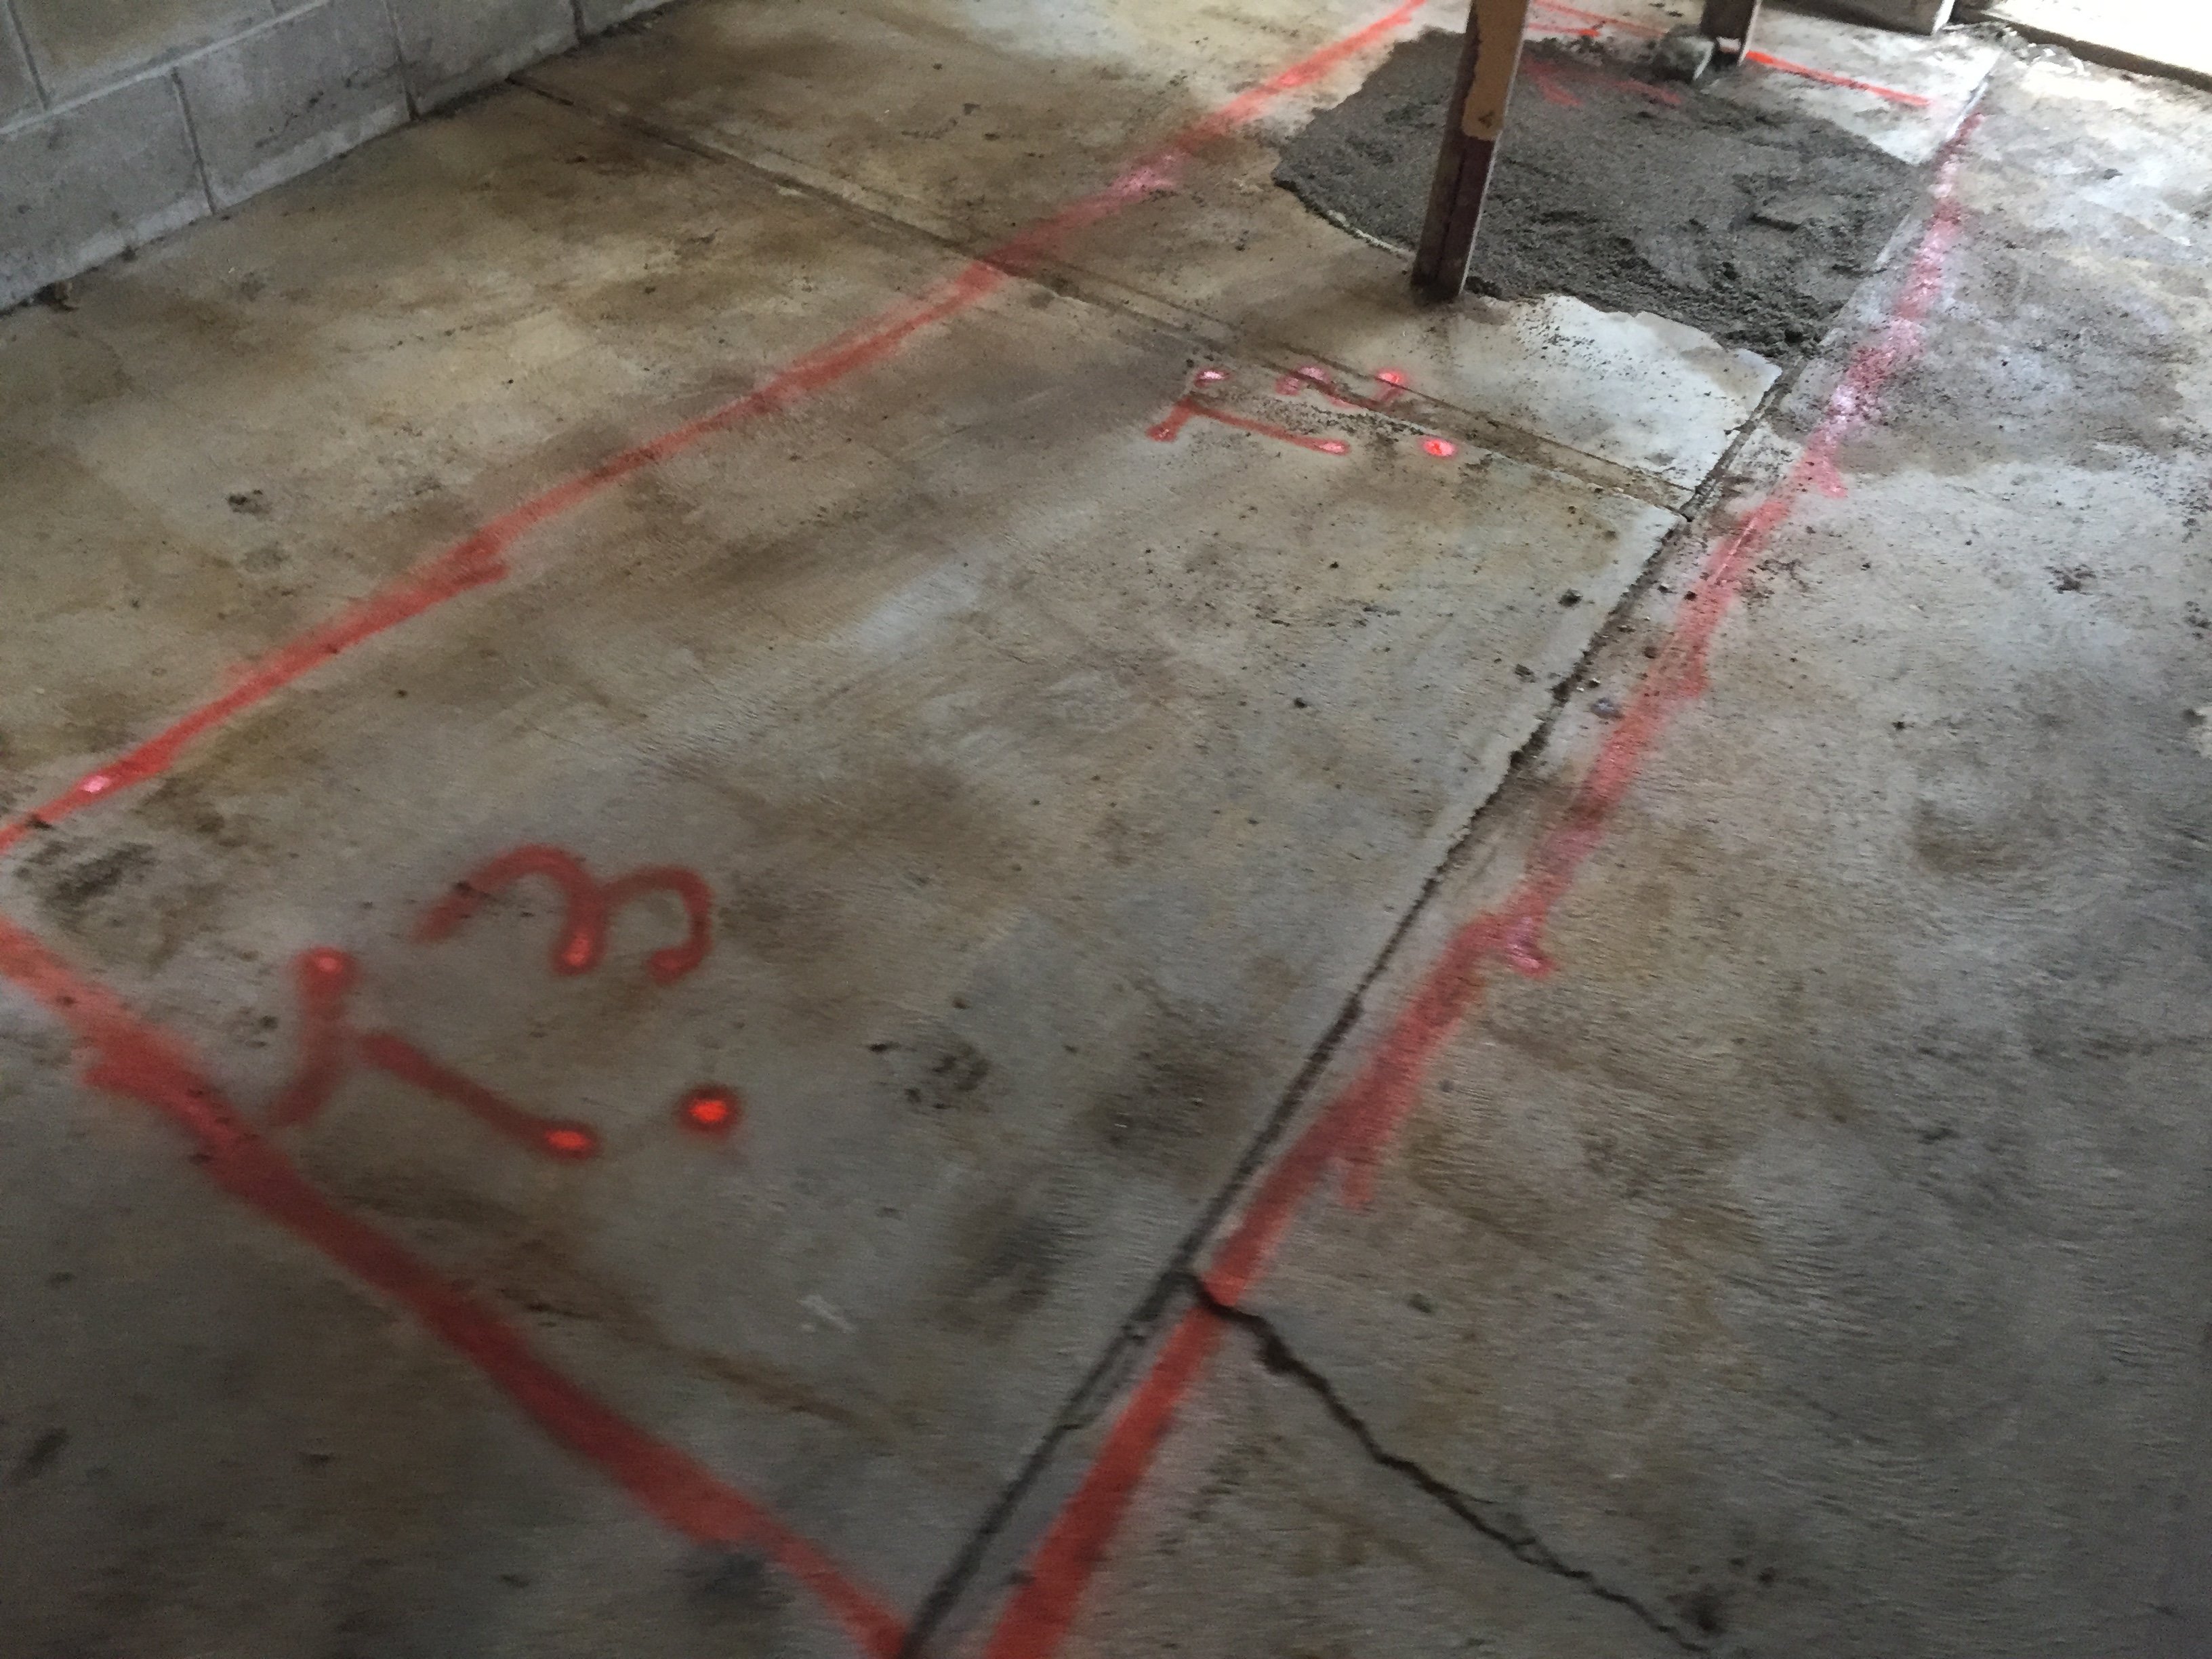
Lastly a tank can be filled with a clean sand fill as the following photo demonstrates. In this photo you are seeing the tank during the process, ultimately more sand is added filling the space.
Step 6: Restoring the excavated area.
In addition to cleaning and filling the tank in place, the outside fill and vent to the tank needs to be sealed so that oil can no longer be delivered to the out of service tank. You must also back fill the area excavated to access the tank. Typically a 4' by 4' area is excavated to safely access the tank top.
Soil Sampling Site Assessment
aka
How do I know the tank abandoned in place didn't leak?
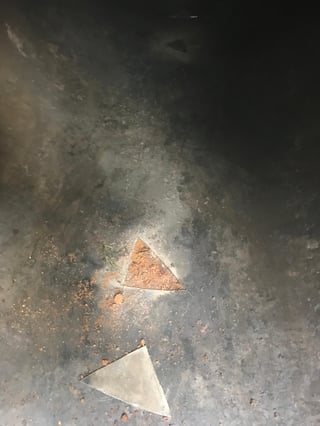
Many people believe that if you leave abandon in the ground you can't obtain soil samples to determine if the tank leaked. This is a false assumption as there are requirements for commercial tanks, which include obtaining soil samples even if a tank is abandoned in place. How this is performed is by cutting holes or as we say in the industry coupons in the bottom of the tank. This coupon clipping allows the soils below the tank to be obtained and placed into laboratory supplied glassware and submitted to a licensed laboratory for analysis. The photo below shows a triangle shaped coupon cut in the bottom of the tank.
Now there are many people who had their tanks filled in place and who did not obtain soil samples, either because they got bad advice from the removal company or they did not want to find a problem, or both. These tanks are a whole separate issue, which you can learn more about by clicking the following link:
In summary, most tanks can be removed for the same cost as abandoning a tank in place. These are sites that have a tank in an accessible location, which is the vast majority of tanks. Now there are situations where there are obstructions that hinder the physical removal of a tank. Maybe you could remove these tanks, but often times the math doesn't work, meaning it is just much more expensive to remove than abandoning the tank in place.
Curren recommends abandoning an underground storage tank in place when the tank is located under a building or would endanger a building structure if removed. It should be noted that some townships and municipalities may say they do not allow abandonment in-place. This is typically not the case as the town would have had to enact a statue or law, which takes time and money. Ask to see the regulation. If abandonment in-place is the only option, then soil sampling beneath the tank is highly recommended.
Still have question? Call Curren Today.
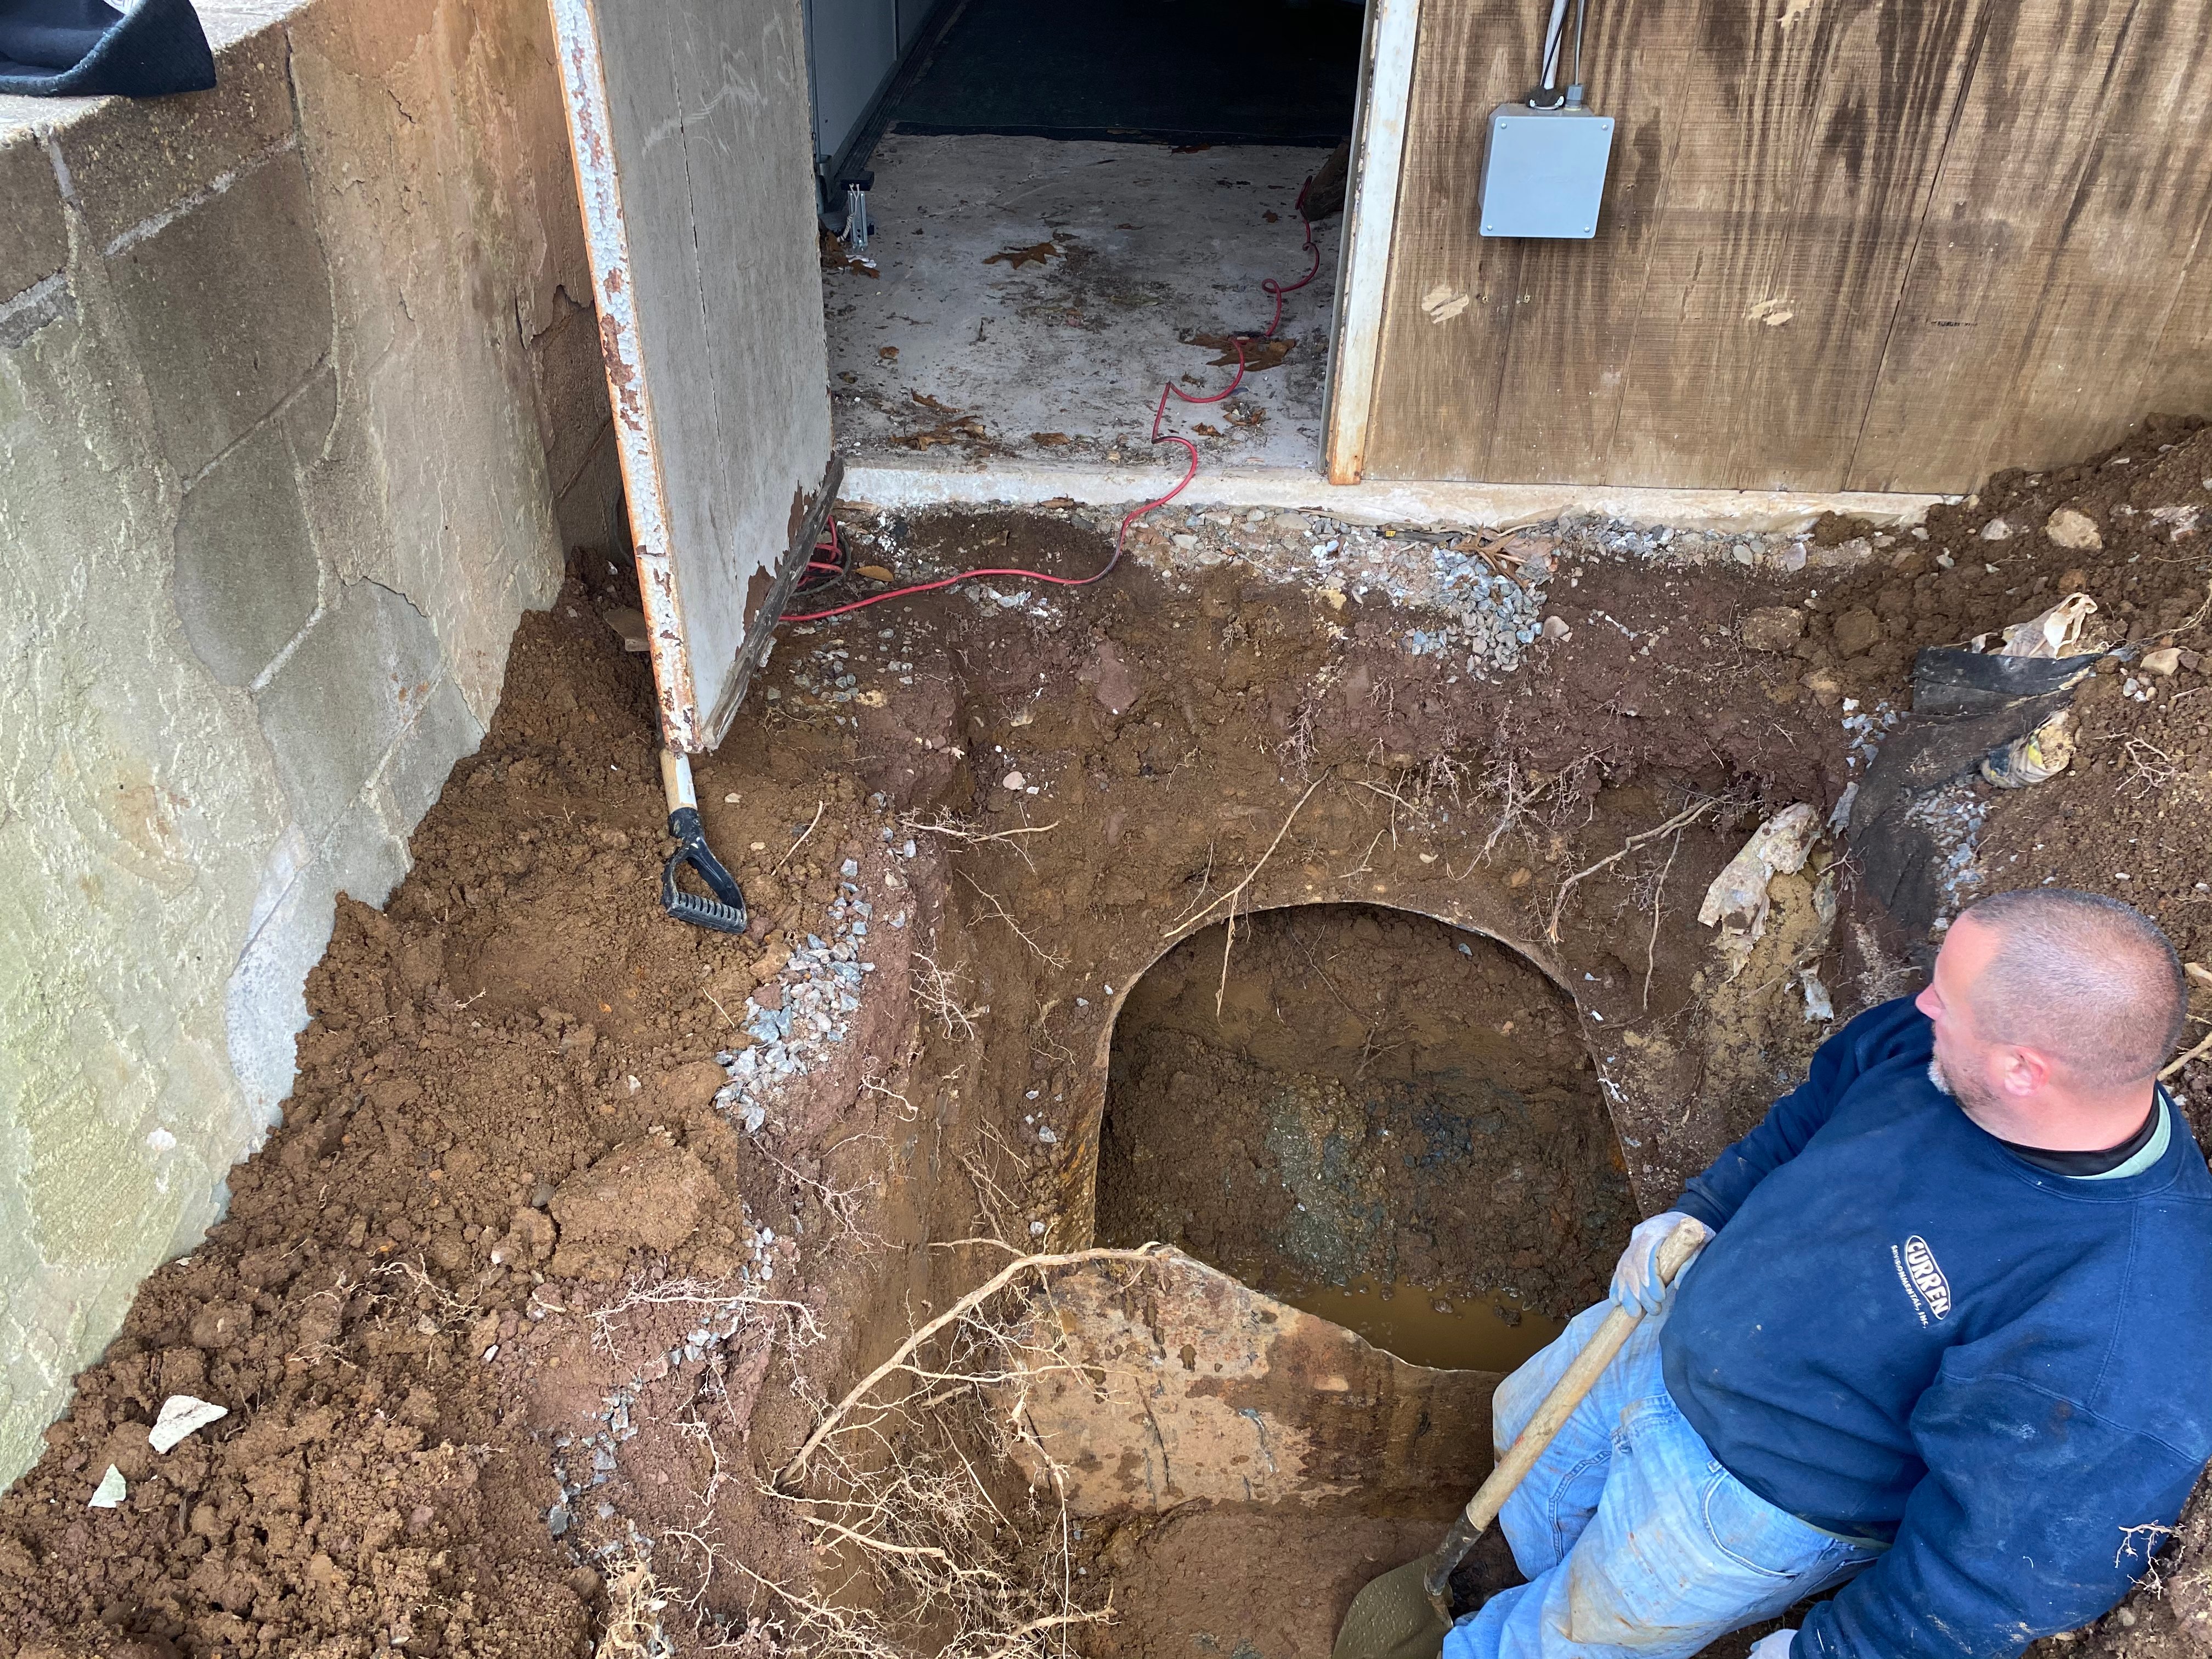
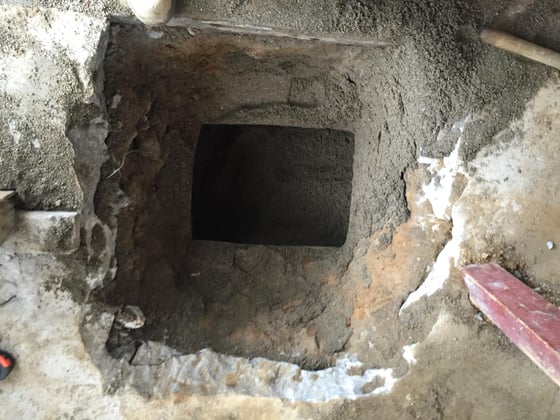
Some buried oil tanks have had structures built over them, requiring the tank to be closed in place. The photo above is one such property. This tank was cleaned, soil sampled and filled with sand. The report Curren provided allowed the property to be sold.