Hot Environmental Topics

Your Bloodwork Flagged Mold — Here's What to Do Next

Mar 30, 2026 7:30:00 PM / by Tiffany Byrne

0 Comments

Mold Exposure & Your Health: What Your Bloodwork May Be Telling You And Why a Professional Inspection Is the Critical First Step

If your doctor has ordered bloodwork that suggests mold exposure, you may be left wondering: where is this coming from? Understanding mold, its effects on the human body, and how to properly investigate your environment is essential to protecting your health and finding real answers.

Your Bloodwork Flagged Mold Exposure — Now What?

Bloodwork that indicates mold exposure is an important signal from your body that something in your environment may be harming you. However, bloodwork alone cannot tell you where the mold is coming from. Mold is pervasive in the natural world — it exists outdoors, in workplaces, in vehicles, in schools, and yes, potentially in your home.

The key to resolving mold-related health issues is identifying and eliminating the source. That process begins with a thorough, professional investigation.

The House Is the Starting Point — But Not Always the Source

While your home is often the most logical place to begin investigating mold exposure, it is important to recognize that you may be exposed to mold in many different environments throughout your daily routine. Possible sources of mold exposure include:

    • Your home or apartment
    • Your workplace or office building
    • Schools or childcare facilities
    • Vehicles (cars, trucks, RVs)
    • Gyms or recreational facilities
    • Outdoor environments with high mold spore counts

Because mold spores travel freely through the air and can settle on virtually any surface, pinpointing the exact source requires systematic investigation — starting with the place where you spend the most time: your home.

Why a Qualified Mold Inspection Matters

Not all mold inspections are created equal. A qualified mold inspector brings the training, equipment, and expertise necessary to detect mold problems that may not be visible to the naked eye. Mold commonly hides behind walls, under flooring, in HVAC systems, inside attics, and in crawl spaces.

A professional inspection typically involves two critical components:

    • Air Sampling Air sampling captures and analyzes the types and concentrations of mold spores present in the indoor air. These samples are sent to an accredited laboratory for analysis. Elevated spore counts — particularly of species known to produce allergens or mycotoxins — can indicate an active mold problem even when no visible growth is present. Air sampling also provides a comparison between indoor and outdoor spore counts, helping determine whether indoor levels are abnormally elevated.
    • Surface Sampling Surface sampling involves collecting swab or tape samples from areas where mold growth is visible or suspected. These samples identify the specific mold species present, which is critical information for assessing health risk and determining the appropriate remediation approach. Certain mold species are associated with more serious health concerns and require specialized remediation protocols.

How Mold Affects the Human Body

Mold impacts health through three primary mechanisms: spore exposure, chemical emissions, and mycotoxin production. Understanding each of these is essential to understanding why mold exposure can cause such a wide range of symptoms.

Mold Spores and Allergens

Mold reproduces by releasing microscopic spores into the air as part of its normal life cycle. These spores are invisible to the naked eye and can be inhaled easily — often without any awareness that exposure is occurring. Many mold spores carry allergens that trigger immune responses in sensitive individuals.

According to the CDC and EPA, inhaling or touching mold spores can trigger allergic reactions in sensitive people, including hay fever-like symptoms such as sneezing, runny nose, red eyes, skin rash, and asthma attacks in those with asthma. Mold exposure can also irritate the eyes, skin, nose, throat, and lungs—even in non-allergic individuals.

Common allergic reactions to mold spore exposure include:

    • Sneezing
    • Nasal congestion
    • Coughing
    • Skin rashes
    • Asthma attacks and worsening of asthma symptoms
    • Eye irritation, redness, and watering

Microbial Volatile Organic Compounds (MVOCs)

In addition to physical spores, mold actively emits chemical byproducts called Microbial Volatile Organic Compounds, or MVOCs, as part of its metabolic processes. These chemicals are responsible for the characteristic musty smell that many people associate with mold — though it is important to note that the absence of odor does not mean mold is absent.

MVOCs become airborne and can be inhaled, leading to a range of health concerns that are often mistaken for other conditions. Common reactions to MVOC exposure include:

    • Headaches and migraines
    • Nausea
    • Dizziness and difficulty concentrating
    • Persistent fatigue and low energy

Mycotoxins: The Most Serious Threat

Certain mold species produce potent toxic substances called mycotoxins. Unlike spores, which must be inhaled to cause harm, mycotoxins can enter the body through inhalation, ingestion, or absorption through the skin — making them particularly dangerous and difficult to avoid in a contaminated environment.

Mycotoxins are recognized as some of the most toxic naturally occurring substances on earth. They can cause significant, lasting health problems and have been linked to systemic illness. However, major health authorities like the CDC note that while mycotoxins pose risks primarily through ingestion (e.g., contaminated food), evidence for widespread health effects from typical indoor inhalation exposure is limited—though sensitive individuals, those with compromised immune systems, or in heavily contaminated environments remain at higher risk. The body systems most commonly affected by mycotoxin exposure include:

    • Central Nervous System — cognitive difficulties, mood changes, neurological symptoms
    • Immune System — increased susceptibility to infection, autoimmune reactions
    • Respiratory System — chronic cough, shortness of breath, pulmonary inflammation
    • Digestive System — nausea, abdominal pain, intestinal disturbances

Don't Overlook the Outdoors

Outdoor mold spore counts fluctuate significantly based on season, weather, and geographic location. In certain regions and during certain times of year, outdoor spore counts can be extremely high — high enough to trigger significant health reactions in sensitive individuals, even without any indoor mold problem.

There are times when the inspector will collect outdoor air samples as a baseline during the inspection process. This allows for a comparison between indoor and outdoor spore levels and helps determine whether the source of your exposure is primarily indoors or whether outdoor conditions are contributing to your symptoms.

Taking Action: Your Next Steps

If your bloodwork has indicated mold exposure, here is a recommended course of action:

    • Contact a qualified mold inspector to assess your home, an inspector that has been in business for quite some time and doesn't work out of PO Box. Your house is the most common environment for prolonged exposure.
    • Request both air sampling and possibly surface sampling as part of the inspection. Do not rely on visual inspection alone.
    • Keep a symptom journal, noting when and where your symptoms are most pronounced — this information can help identify patterns and non-residential sources.
    • Consider having other frequently visited environments (workplace, vehicle) assessed if home testing returns normal results.
    • Follow up with your physician and share the inspection results. Laboratory data from a professional inspection can directly inform your medical treatment plan.
    • If mold is identified, work with a qualified remediation contractor — not just a general contractor — to ensure it is properly removed and the source moisture problem is corrected.

For more prevention tips, check the EPA's free guide: "A Brief Guide to Mold, Moisture, and Your Home."

The Bottom Line

Mold-related illness is a serious and often underdiagnosed health concern. The symptoms can mimic many other conditions, and without identifying and eliminating the source, recovery is difficult. If your bloodwork is pointing to mold exposure, do not ignore it.

A professional mold inspection with proper air and surface sampling is the most important first step you can take. It transforms a vague concern into actionable data — giving you and your medical team the information needed to protect your health and restore your environment.

Your health depends on the environment around you. Start by understanding it. At Curren Environmental, we specialize in thorough inspections —contact us today to schedule your professional assessment.

Note: No federal health-based standards exist for mold spore levels, so results focus on relative indoor/outdoor comparisons and species identification. There is no mold licensing in PA, NJ and DE. The closest state is NY.


Read More

Why AI Cannot Replace a Qualified Mold Inspector!

Mar 23, 2026 9:35:01 AM / by Tiffany Byrne

0 Comments

 A PROFESSIONAL INSIGHT FROM CURREN ENVIRONMENTAL

Artificial intelligence has real limitations when it comes to mold assessments. Here’s what every property owner and contractor needs to understand.

Overview

AI tools are everywhere — and the environmental consulting industry is no exception. But when it comes to mold inspections, water intrusion investigations, and remediation planning, AI falls critically short. Here’s why the experience and judgment of a qualified inspector can never be replaced by an algorithm.


1. AI Can Not Physically Inspect a Property

Mold doesn’t exist in a vacuum. It grows where water goes — and water follows paths that only an experienced inspector can trace. Behind walls, beneath flooring, inside HVAC ductwork, above drop ceilings, and in crawlspaces where condensation silently accumulates over years. No AI tool can walk those spaces.

A qualified mold inspector uses a combination of moisture meters, thermal imaging cameras, borescopes, and decades of pattern recognition to identify the source of moisture that is feeding mold growth. They observe building conditions in real time: the slope of a foundation, the path of a plumbing leak, the location of a failed vapor barrier, or the building envelope failure that only becomes apparent from inside a closet.

AI cannot smell musty odors. It cannot feel dampness in drywall. It cannot recognize the subtle staining on a joist that tells an experienced inspector exactly where a roof has been leaking for three years. Physical presence, sensory input, and professional judgment are irreplaceable in this work.


⚠ Critical Limitation

Without physically identifying and confirming the water source, any mold assessment — regardless of how it was generated — is incomplete and potentially misleading. Remediation without source correction guarantees mold recurrence.


2. AI Can Not Identify Mold Spores From a Photo

Some AI tools claim to identify mold types from photographs submitted by users. This is not scientifically valid — and it can be dangerous.

Mold identification at the genus and species level requires microscopic analysis by a trained mycologist or laboratory analyst. Different mold species can appear visually identical to the naked eye or even in a high-resolution photograph — yet have dramatically different health implications and require different remediation approaches. Stachybotrys chartarum (commonly called “black mold”) and ordinary Cladosporium can look similar in a photo but represent very different situations for property occupants.

Professional environmental sampling — air samples, bulk samples, surface tape-lift samples, or swab samples — are collected using established protocols and analyzed by accredited laboratories under chain-of-custody procedures. The results are reviewed by credentialed professionals in context with conditions observed during the physical inspection. A photograph submitted to an AI chatbot carries none of this scientific rigor.


“The color of mold tells you almost nothing. The genus, the concentration, the location, and the moisture conditions behind it — that’s what drives a remediation decision.”


3. AI Can Not Interpret Lab Data Without Site Context

This may be the most misunderstood limitation of all. After samples are collected and analyzed, you receive laboratory data — spore counts, species identification, and comparative indoor vs. outdoor levels. That data means very little without the context that only a physical site visit can provide.

Here’s why: elevated mold spore counts inside a building could mean active mold growth, disturbed settled dust from a previous mold condition, a window left open during high outdoor spore conditions, or cross-contamination during sampling. Without knowing what the inspector observed on-site — where samples were collected, what building conditions were present, where moisture intrusion occurred — the lab report is just a table of numbers.

An experienced environmental professional interprets lab data alongside direct observations: the location and extent of visible growth, moisture readings, the history of water intrusion events, the construction type of the building, and the specific concerns of the occupants. AI tools that offer to “read your mold lab report” and generate remediation recommendations are doing so in a complete vacuum of this critical context.

Remediation scopes developed without site-specific context can result in a scope that is far too narrow — leaving active mold behind — or excessively broad, costing property owners thousands of dollars in unnecessary work. Either outcome is a failure.


⚠ Remediation Risk

A remediation contractor who bases their scope of work solely on AI-generated interpretation of lab data — without a qualifying site inspection — may be creating significant liability for themselves and their client, and potentially leaving occupants at ongoing health risk.


What AI Can and Can Not Do

Task

Qualified Inspector

AI Tool

Physically locate the moisture source

✔ Yes — with instruments & direct observation

✘ No — cannot access the property

Identify mold species accurately

✔ Yes — through accredited lab analysis

✘ No — photos are not valid for ID

Interpret lab data in context

✔ Yes — combined with site observations and/or site conditions and photos

✘ No — lacks site context to interpret data

Develop a remediation protocol

✔ Yes — based on inspection and/or photos + lab results together

✘ No — cannot account for unmeasured conditions

Provide general mold education

✔ Yes

✔ Yes — appropriate AI use

Help you form questions for a professional

✔ Yes — a reasonable use of AI


Where AI Can Help — And Where It Stops

We’re not anti-technology at Curren Environmental. AI tools can be genuinely useful for general education — helping property owners understand what mold is, what health effects are associated with different exposures, or what to expect during a professional inspection. If AI helps you arrive at a consultation better informed, that’s a good outcome.

But the line must be clearly drawn - AI tools should never be used as a substitute for a qualified professional inspection, laboratory analysis under chain-of-custody, or a site-specific remediation protocol. When that line is crossed — when someone relies on an AI-generated “mold report” instead of a qualified professional — health,  safety, and cost are genuinely at risk.

Solving the mold problem requires understanding water movement, building envelope performance, HVAC dynamics, occupant behavior, and construction materials — all evaluated in real time, in a real building, by a real professional.

The Bottom Line

If you have a mold concern in a residential or commercial property, the path forward is clear -  engage a qualified environmental professional to conduct a physical inspection, collect samples following established protocols, have those samples analyzed by an accredited laboratory, and work with your inspector to develop a remediation scope based on both the inspection findings and the laboratory data — together.

At Curren Environmental, our inspectors bring decades of experience to every assessment. We combine thorough physical inspections with laboratory analysis and clear, actionable reporting — giving property owners and remediation contractors the complete picture they need to make informed decisions.

Don’t let an AI tool give you false confidence in an incomplete assessment. When it comes to mold, what you can’t see — and what an algorithm can never perceive — is often the most important part of the story.


Have a Mold Concern?

Our qualified inspectors are ready to conduct a thorough, professional assessment of your property. Contact Curren Environmental today for real answers — not algorithmic guesses. Visit www.currenenvironmental.com to schedule an inspection.  Check out our YouTube page for more information on mold. 


This article is provided for educational purposes. Mold inspections, sampling, and remediation should always be conducted by qualified professionals following applicable industry standards.

Read More

Inspect or Remove an Underground Oil Tank

Mar 2, 2026 7:15:00 PM / by David C Sulock posted in tank leak, oil tank removal pa, underground oil tanks, soil sampling removed tanks, oil tank testing

0 Comments

We get this request weekly. Someone wants to buy a house that has a buried oil tank. Sometimes the tank is being used, other times the tank is no longer in service. Let me cut to the chase, NO, you cannot accurately inspect the tank, it’s buried and is rusting, which no one can see, but you know it's true. Every buried tank will fail. When you fill up your vehicle at the gas station, those tanks have corrosion protection and very expensive monitoring and leak detection systems.

Inspecting heating oil USTs

If you have a buried tank that is being used and it’s older than 20 years, remove and replace it. If you are buying the property, negotiate with the seller to remove and replace the tank and offer monies to perform this work, payable at settlement. While you may not want to open your wallet any further, you did ask about paying for an inspection of the tank, so use that money for removal and replacement.


If you have a buried tank that is not being used on a property you are buying, request that it be removed and soil sampling be completed during removal. The tank is a financial liability that someone ignored and wants to pass the problem to you.  For a matter of reference, a small tank leak can cost $10,000 to $15,0000. Removing an oil tank, maybe around $20,000.00


buried oil tanks

We just had someone call asking about inspecting an out-of-service buried tank on a property they want to buy. Turns out there is a new oil tank in the basement, which they installed to replace the perfectly functioning buried tank. Good money was wasted installing a new tank because the buried tank is fine. Excuse my sarcasm, the new tank 99% of the time was installed because the buried tank was having issues and the owner didn’t dig up the tank because they don’t want to find a problem. They would rather ignore the issue and pass it along to the next person.


Truth be told, we do test buried tanks, and we remove them in three states. But time and time again, testing is a waste of money, and the better financial approach is to remove and test the tank this 100% removing the liability of the tank in the future and is 100% accurate.

Tank Questions?

Call the experts

888-303-1050


can you inspect a buried tank


Read More

Phase I ESA Peer Reviews

Feb 23, 2026 7:45:00 PM / by David C Sulock

0 Comments


Phase I ESA Peer Reviews

What is a Phase I Peer review?

It is a professional review of the ESA report to confirm that they meet industry benchmarks for pre-acquisition due diligence.   In short, it is a peer review to see if the research that is crucial to the Phase I was properly interpreted and if there are necessary next steps to complete, aka a Phase II, which is testing. A peer review is typically done when a Phase I is brought to a transaction, and it is completed by a third party not associated with the buyer or lender.

What is a Phase I Environmental Site Assessment?

AKA ESA, or Phase I ESA, is completed to research potential environmental liabilities regarding the current and historical uses of a property as part of a commercial real estate transaction.  The report is meant to assess if current or historical property uses may have impacted the soil or groundwater beneath the property, and whether the property has an environmental liability that the owner would be responsible for. The lender is subject to the potential liability if the mortgagee defaults.

It is safe to say most commercial properties should and do undergo a Phase I ESA prior to settlement. But some transactions fall apart, and new buyers swoop in and utilize the prior buyers' Phase I. This practice is fraught with issues.   Relying on a Phase I you do not own is subject to liability. Now you can obtain a reliance letter, so you have rights to the report, but how accurate is the report? That is when a Phase I Peer Review is performed.


Why peer review a Phase I?

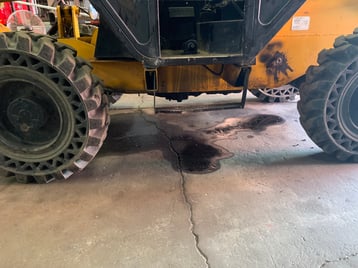
A Peer Review will 100% of the time be completed at a desk, but some reports are so thin and loose on quality, a site walk is also necessary.  Case in point, the photo to the left. 

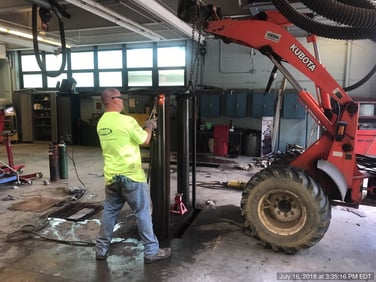
This photo shows a sale involved at a heavy equipment repair facility.  The Phase I report lacked clear detail on the work area where petroleum fluids would be encountered, and,  from experience, this was too big a data gap, so a site visit was also necessary. The photo was just one of many areas where staining was evident, the concrete floor was not intact (heavy equipment weighs a lot and concrete cracks), and yes, testing was required, and remediation was necessary. 

Curren completes thousands of Phase I peer reviews every year, and the quality varies widely. Inexperienced people miss issues that should be noted and investigated. Unfortunately, some of these reviews are completed years later, and anything that was missed is well past any recourse. Not as bad as it is when the Peer review is performed before settlement, and something was indeed missed that requires further evaluation, which means several weeks of delay in settlement.

Let me discuss two real-world scenarios.   A seller gave a buyer their Phase I, which they used to purchase a property through a 1030 exchange. Years later, the property is being sold, the prior Phase I is too old to use, and a new buyer completes a Phase I and Phase II, which leads to $64,000 of environmental cleanup that was associated with prior, not current, uses. In short, in Phase I, the buyer, now seller, relied upon missed issues.


Phase I peer review

The buyer goes to the bank to get a loan for a commercial site (restaurant), the bank requires a Phase I, which they perform by a firm the bank has utilized previously. Buyer’s attorney recommends that the Phase I be peer reviewed, which we have completed. The Phase I did not recommend a geophysical, which we flagged in our review and subsequently completed. The geophysical found a UST, which the seller addressed but spent approximately $47,000 to remediate. Why was this missed? Your guess is as good as ours; it simply was missed.

Have due diligence questions?  


Read More

Crawlspace Oil Tank Removal

Feb 2, 2026 10:15:00 AM / by David C Sulock posted in Crawlspace oil tank, tank removal PA, Tank removal NJ, Crawlspace tank

0 Comments

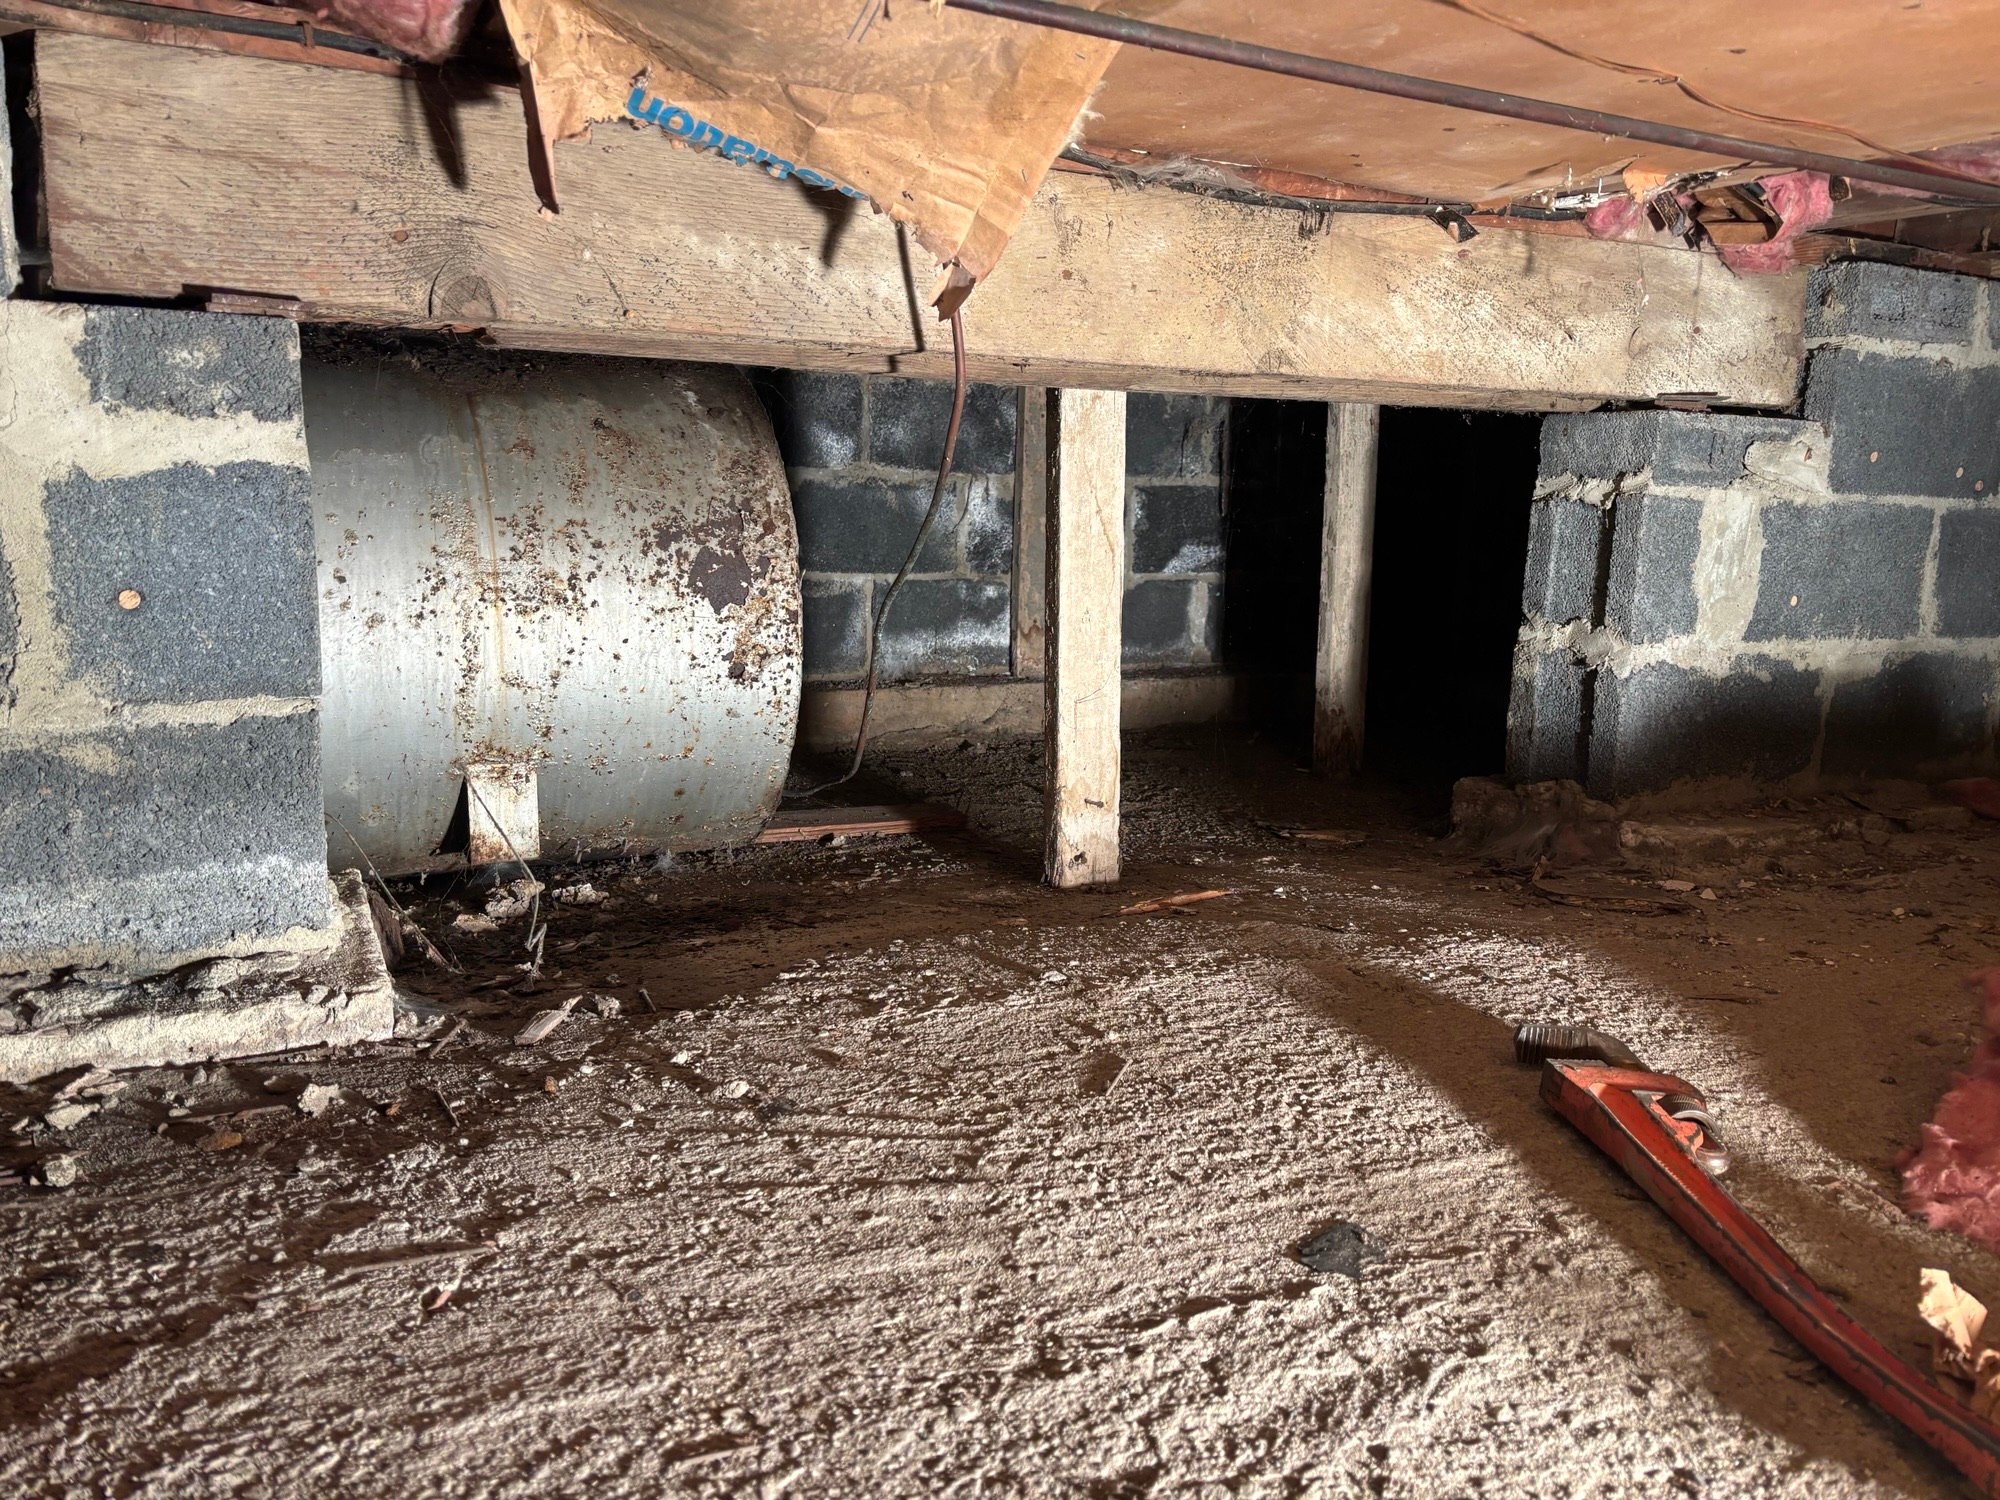
I can't think of a more boring title for an environmental blog, but crawlspace oil tank removal should rank in the top 10.  As boring as it is, old metal tanks that store petroleum compounds such as diesel or heating oil are ticking time bombs, as the low sulfur content of these fuels allows interior corrosion of the tank.  Exterior humidity/moisture causes the exterior of the tank to corrode, so you have two opposing forces generating rust, and when tank integrity breaches, oil will flow.  The average cleanup cost of an oil leak in a basement is $15,000. A crawlspace oil tank leak doubles that cost simply due to the limited access to a crawlspace.

Crawlspace oil tank removal access

I refer to abandoned tanks as deferred maintenance because it is a project that doesn't get addressed, and when the stored oil leaks, it is now an immediate problem, with a cost much higher than if the tank had been addressed before the leak occurred.  Curren has over 30 years of experience managing tank issues and crawlspace tanks while not a favorite, are part of our overall program.  Removing a crawlspace tank is less expensive than cleaning up a leak.


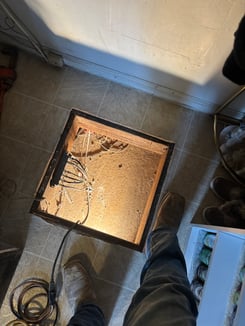
Let's walk through the process, a crawlspace no matter how nice yours is it is called a crawlspace because access is limited.  The access to the crawlspace to the left is through a small hatch in the floor.


crawlspace tank removal

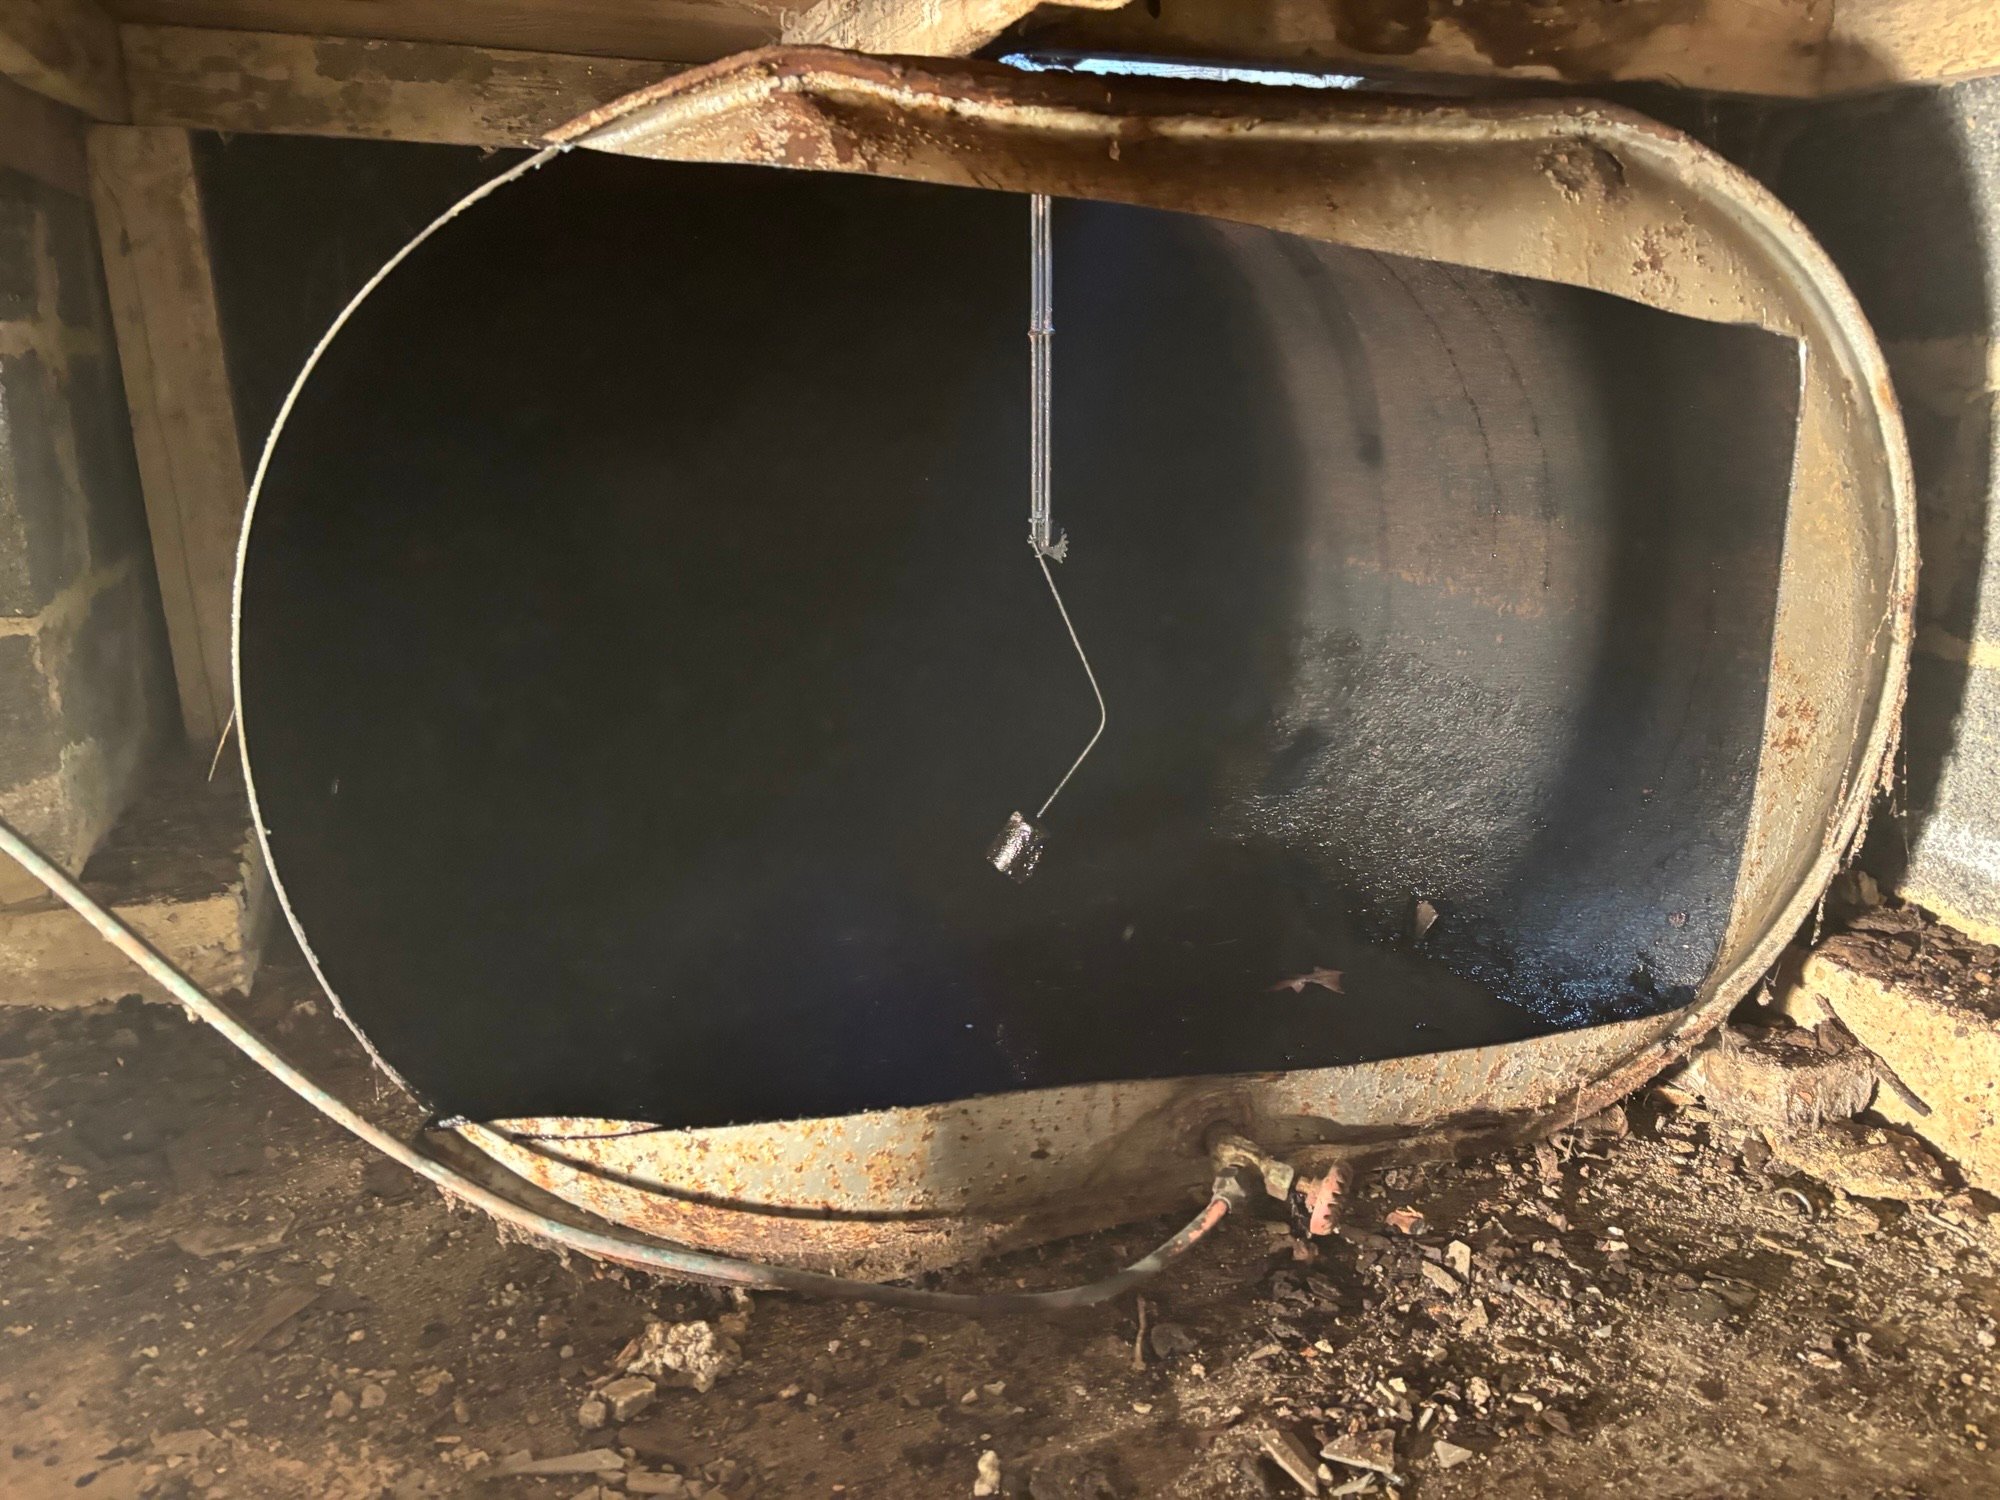
Once you get into the crawlspace, you will see a tank on the other side of the area.   The tank was likely installed after the foundation was installed but before the floor was installed, meaning the tank is wedged into the area, a great reason why no one addressed this tank 10 years ago when they converted to natural gas.  Of course, Curren got called because an oil smell was permeating the home, because the tank finally started to leak.   Fortunately, the tank was on a rough finish concrete floor, but there were still physical issues in trying to remove the tank.   As you can see, we had to cut the HEAD or end of the tank off to access the tank for cleaning, and ultimately cut the tank into 8 pieces to remove it.

crawlspace tank closure

If you have an out-of-use metal oil tank, call Curren  Call Curren Today

The metal is going to rust, oil is going to leak, you will then be forced to address the tank, which is going to cost more now because you have to clean up the oil from that empty tank.


Read More

Why GPR (Ground Penetrating Radar) is the Best Tank Sweep

Jan 26, 2026 2:30:02 PM / by David C Sulock posted in OIl Tank Sweeps, tank sweep with gpr, tank sweep, best tank sweep

0 Comments

Environmental regulations are simple and unfair.  Own a property with an environmental problem and you own the problem, even if you just bought the property and didn't know or cause the environmental problem.

buried oil tank GPR image-Jan-05-2026-01-28-50-6689-PM

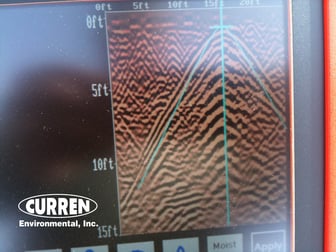
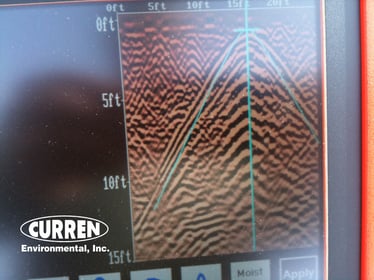
That is why you do a tank sweep before you purchase a property, to look for undisclosed buried oil tanks.   Only one appropriate method should be used to perform a tank sweep, and that is Ground Penetrating Radar or GPR.  GPR is used on commercial properties, so you are using a commercial technology or approach to finding tanks, which translates to a moreeffective tank sweep.   GPR, in layperson's terms, sends radar signals into the ground which will reflect off of solid objects such as pipes, tanks, etc. You get a signal like in the photo, which represents an oil tank.

A tank sweep is due diligence, an evaluation to protect a buyer of a property.  Unfortunately, people do not know what they are getting, and a metal detector is commonly misused to perform a tank sweep, with inaccurate results.  Since metal detectors can only detect metal and provide no image, the data is open to misinterpretation.


IMG_7938

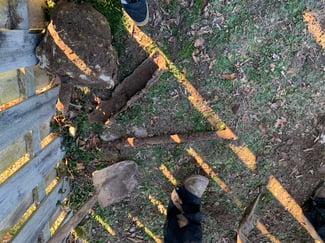
The photo shows a small pile of metal pipes, which a tank sweep said was a tank.  Curren got permits to address the alleged tank and found old sewer pipes.  Thinking that perhaps the tank sweep mismarked the tank location, we performed further evaluation with the thought that there was indeed an oil tank.  


IMG_7941


Further evaluation found a buried object with a FLAT top, which is not a signal for an oil tank, the area was excavated, and we found an old cesspool.   This rather large object apparently was missed by the metal detector, and we determined the presumed tank was actually the buried pipes.

GPR would have found the cesspool and determined the metallic signature was buried pipes, but since GPR was not used the owner had to spend time getting permitting and digging up his yard to not find an oil tank, but now they have an old cesspool to address as cesspools are a safety issue and are a disclosure when you list a home for sale.


IMG_7940IMG_7942

If you want accurate tank sweep results, use GPR

If you need a professional to complete your tank sweep, call Curren

Call Curren Today

Read More

Managing Lead Paint in Your Home

Jan 19, 2026 11:00:00 AM / by David C Sulock

0 Comments

Adding lead to paint made the paint stronger, dry faster, and moisture resistant.

Approximately three-quarters of the nation's housing built before 1978 contains lead-based paint, stain, or varnish. When properly managed and maintained, lead-containing building materials pose minimal risk. Lead-based paints were banned for residential use in 1978 due to health concerns, which means homes built after this date are unlikely to contain lead paint, stains, and varnishes on building materials.  But if you go antiquing and buy a vintage mantle, corner cabinet, and build it into your new home you may have brought lead into a post-1978 home.

Managing Lead Paint in Your Home

Lead becomes a concern when paint, varnishes, and stains deteriorate through peeling, cracking, or chalking. As the paint, varnish, and stains break down, it create lead chips and dust. High-friction surfaces—such as windows, doors, floors, porches, stairways, and cabinets—are particularly prone to generating lead dust through normal wear and tear. While intact lead coating materials are not inherently dangerous, any activity that creates lead-contaminated dust or fumes, including sanding, scraping, or friction, can create exposure risks.

When Lead Testing is Necessary

Homes built before 1978 should be tested for lead-based paint, stains, and varnishes, particularly if you're planning any renovation, repair, or remodeling work. Testing identifies where lead is present so you can make informed decisions about how to manage it safely. If paint appears to be in good condition, knowing the location of lead-based paint helps you monitor those areas and prevents accidental disturbance during future projects.


Homes built in 1978 or later generally do not require lead testing, as lead-based paint was banned for residential use that year. However, if you have reason to believe older painted materials or components were incorporated into your newer home, testing may still be warranted.

Lead Exposure Pathways

Understanding how lead exposure occurs helps you prevent it. Lead-coated surfaces in good condition present minimal risk, but once lead-containing material separates from building surfaces through deterioration or disturbance, an exposure pathway is created. Children under six years old are most vulnerable to lead exposure because:


  • They may chew on surfaces such as windowsills and door edges
  • They can ingest flaking paint chips
  • Their natural hand-to-mouth behaviors increase the likelihood of ingesting lead dust
  • Lead can have a sweet taste, which may attract children

Lead Questions?

Call the experts 888-301-1050

Both children and adults are exposed to lead primarily through ingestion or inhalation of lead dust and fumes. Common sources include deteriorating lead paint, contaminated water and soil, certain toys and jewelry, and some imported candies or medicines. Adults face additional exposure risks through occupations and hobbies involving lead-based products, such as construction work, pottery, metalworking, or firearms handling.


Renovation and Remodeling Considerations

Renovation and demolition activities can release lead into a home's environment, which is why testing building materials in pre-1978 homes is essential before beginning any project. Federal law requires contractors performing renovation, repair, or painting projects that disturb lead-based paint in homes built before 1978 to be EPA-certified and follow specific work practices to prevent lead contamination. If you're planning a DIY project in a pre-1978 home, consider hiring a professional to test first. This allows you to either hire a lead-safe certified contractor or take appropriate precautions if you proceed yourself.

Lead Exposure Prevention

Preventing lead exposure focuses on maintaining your home and establishing good household practices:

  • Ensure children cannot access peeling paint or chewable surfaces painted with lead-based paint
  • Maintain all painted building materials in good condition to prevent deterioration
  • Regularly wet-mop floors and horizontal surfaces, as household dust can contain lead particles
  • Pay special attention to windowsills and window wells, which tend to accumulate more dust
  • Keep all surfaces clean through consistent maintenance
  • Wash children's hands frequently, especially before meals
  • Wash toys and pacifiers regularly


Managing Lead Paint as a Homeowner

If testing reveals lead-based paint in your home, don't panic—lead paint that is intact and in good condition can be safely managed with proper maintenance and awareness.

When Lead Paint is Intact and in Good Condition:

  • Regular inspection is your best tool. Check painted surfaces periodically for any signs of wear, chipping, or peeling, especially in high-traffic areas
  • Maintain painted surfaces by addressing any minor damage promptly before it becomes a larger problem
  • Clean regularly using wet-mopping and damp cloths to capture any dust. Avoid dry sweeping or dusting, which can spread particles into the air
  • Control moisture by fixing leaks and addressing condensation, as moisture accelerates paint deterioration
  • Monitor friction surfaces like windows and doors more closely, and consider applying fresh coats of non-lead paint over intact lead paint to provide an additional protective barrier (this is called "encapsulation")
  • Educate your household about which surfaces contain lead paint so everyone can avoid creating dust through activities like furniture rubbing against walls


When Lead Paint Shows Signs of Deterioration:

  • Address the issue promptly before it worsens. Small areas of chipping or peeling should be stabilized
  • Hire a lead-safe certified contractor for any repairs or renovation work in areas with lead paint. These professionals are trained in containing dust and preventing exposure
  • Never attempt to sand, scrape, or remove lead paint yourself without proper training, equipment, and containment measures
  • Consider encapsulation or enclosure methods, which cover lead paint with new materials rather than removing it—often a safer and more cost-effective solution


LBP Survey

how do i test for lead paint

If you question if lead-containing building materials are in your home, a Lead-Based Paint Survey will assist you in knowing for sure.   Surveys are like LBP inspections in that an electronic lead paint analyzer is used on-site to test for the presence of lead. Curren utilizes a SciAps X-550 X-Ray Fluorescence (XRF) Lead Paint Analyzer to determine the lead content of the painted surfaces. The XRF will determine if lead exists on the component tested (within seconds); if the test is positive, the condition of the component is evaluated. Even if lead paint is detected via the XRF, the condition of that paint will determine if further action is warranted. 

Read More

How to Control Mold in the Crawlspace

Jan 5, 2026 3:30:00 PM / by David C Sulock posted in Mold Evaluation, Crawlspace Management, Crawl space management

0 Comments

Can you think of anything more boring to talk about than a crawlspace?  Tough to keep readers after that statement, but wait one minute.  Crawlspaces are important because:

  1. As much as 50 percent of the air inside your home comes up from the crawl space.
  2. Crawlspaces, attics, and unfinished basements are the 3 most common areas to find mold in a home.
  3. Many Crawlspaces have HVAC ducts that can pull air from the crawlspace into your home. If the crawlspace isn't clean, neither is the air inside your home.
  4. Damp crawlspaces will breed termites, spiders, ants, and other insects.
  5. About 90% of crawlspaces we evaluate are in need of attention.

Here is the good news: Curren consults on environmental building issues, and I can explain both the DIY crawlspace management as well as hiring a company to address the crawlspace.    To be objective, both DIY and professional crawlspace management can have VERY similar results; the thousands of dollars between the two rarely justifies the marginal increase professional management achieves.

Water proofing (ahem, water management) companies that do crawlspaces will not want you to read this.

Why do Crawlspaces have mold growth?

Traditionally, builders either insulated the floor above the crawlspace or left it uninsulated, while keeping wall vents open for ventilation. This approach assumed that vents would remove moisture, but in humid climates, they actually allow moist air to enter. When this air contacts cooler crawlspace surfaces, condensation forms. This process often results in drooping insulation and mold growth on exposed wood.

Crawlspaces are typically cooler and less humid than outdoor air during summer, which draws moisture inside. Humid air then condenses on cold wood and concrete surfaces, creating a persistent moisture source. This design results in a high likelihood of mold growth, with a 90% probability.

 A crawlspace will, by nature, be cool in summer and less humid than outdoor air, so moisture and humidity will be drawn to the space, allowing the humid air to condense on the cold surfaces of wood and concrete in the crawlspace. This provides a continuous source of moisture in the crawl space.  This type of design has a 90% chance of allowing mold to grow.

Crawlspace mold

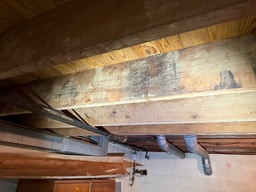
This photo shows a crawlspace that has ATTEMPTED to control moisture; there is a black poly vapor barrier on the floor.  But if you look closely, you can see it doesn't cover the floor 100% (there is exposed soil).  There are also open vents that you cannot see.  Bottom line, the poor management of moisture is allowing mold to grow; you can see the white staining on the wood.


On a basic level, humidity is a real driver of mold growth in a crawlspace, but you can also have other sources. Physical water intrusion, gutters, plumbing leaks, as well as improper exterior management, can be contributing factors.

The historic design of a crawl space creates a perfect environment for mold. It has oxygen, it is dark, there is ample food (dirt, wood, insulation, animal waste), and as discussed, the temperature and humidity level create the perfect ecosystem for mold growth.

Crawlspace Management

Exterior of the Crawlspace

If you want to have a well-maintained crawlspace, let's start with easy to hard things you can do.  On the exterior perimeter of the crawlspace, all soil should be sloped away from the foundation, allowing water to flow away, not toward the crawlspace.   I would say 60% of inspections find the exterior grading in need of improvement.   Next, your roof leaders (gutters to the layperson) should have 5' to 10' extensions so rainwater flows far away from the foundation.  Understand that water in the soil around a foundation and even the masonry foundation will draw moisture into the crawlspace, so reducing the water around the foundations also decreases moisture in the space.

The easiest way to know if you need to do any of this is to actually go into the crawlspace when the weather is nice and again after or during a rainstorm to see if you are getting water entry.  You can also walk the exterior with an umbrella when it's raining to see if water puddles near the foundation; those are the problem areas.

Interior of the Crawlspace

There are three things you need to do to reduce moisture inside the crawlspace. 

sealing crawl space vents

First, seal all exterior vents in the foundation; this can be performed with rigid foam board, cut to fit.  Spray foam can be added along the edges to really seal the opening.   When you have the can of spray foam going, seal any penetrations in the foundation where you can see sunlight entering, like for hose bibs, utilities, etc.   You can also install plates on the outside of the foundation, like the photo to the left.  It's best to do both, as the foam board also insulates the opening.  An overlapping layer of plastic sheeting is placed on the floor of the crawlspace.  Home Depot sells a 6-mil roll of poly sheeting, 20' by 100', for $127.  You can use bricks to weigh down corners and along the seam.   A double layer is best; the hardest part is having to cut around internal supports in the space.


dehumidifier screen

Install a dehumidifier with tubing that allows it to drain outside the crawlspace.  You will need electricity and installation in the approximate center of the space is best.  Every three months, you must pull out the screen and run it under water.   The photo to the left is a screen the owner never knew existed.  For a baseline, if you hold a clean screen up to your face, you can see through it; this one failed.


This DIY fix, excluding your labor, is approximately $1,000.00.  This is with about $300 in plastic, $350 for a decent dehumidifier, and the balance for other materials.  Larger spaces will cost more in materials. This assumes you have an outlet in the crawlspace to plug a dehumidifier into; otherwise, you need an electrician.   

Naysayers will tell you this approach doesn't 100% air seal the space. Well, guess what, none of them do.  Does every person use a dehumidifier in their basement?  It runs right? collects water, and your basement has walls? a floor and a ceiling?  Is it pretty sealed?  But not 100% apparently.

Pro Tip: If you are going to address your crawlspace for moisture, you should also address mold that likely formed before your fixes. Mold Remediation

Mold remediation of a crawlspace will remove existing mold and future-proof the space by applying a fungistatic coating (mold inhibitor) to the wood, which is the mold's food source.  Mold-resistant coatings have 10-year warranties to prevent mold growth on the surfaces where it is applied.  But in practice, you will be dead before mold grows on it as UV light breaks it down which your crawlspace doesn't receive.

Questions? 888-301-1050

Professional Crawlspace Management

You just received professional advice on managing your crawlspace.  But maybe you are physically unable to perform the recommended tasks.  Google "crawlspace management", scroll down about 8" on the page, scrolling by all the companies that are paying for placement of their ads, and look for organic search results.

Companies that get paid to manage a crawlspace.   "crawlspace encapsulation".
For a 2,000 sq ft crawlspace, the average cost is around $12,000, with a typical range of $8,000 to $12,000.  Is this needed and worth the expense?   80% of the time, no.  Will it increase the value of your home when you sell?  Oh yeah, people ignore a good school system, granite countertops, and a large closet,  and go for the sexy crawlspace.
 
Crawlspace Encapsulation will follow the following actions:
 
  • Installing a Vapor Barrier: A thick (typically 8 to 20-mil) polyethylene liner is installed across the entire floor and up the foundation walls and piers to help minimize moisture from entering the space.
  • Sealing Foundation Vents:  Crawl space vents, air leaks, gaps, and cracks around plumbing and wiring penetrations are sealed to prevent unconditioned outside air and pests from entering.
  • Insulation of foundation Walls: Foam board insulation is often installed on the interior foundation walls to stabilize temperatures and improve energy efficiency.
  • Humidity Control: Installing a dehumidifier to remove any remaining moisture from the air and maintain optimal humidity levels (ideally between 45% and 55%).
  • Drainage (if needed): In cases of active water leaks or potential flooding, an interior drainage system and a sump pump may be installed to remove standing water before it becomes an issue

Crawlspace

The photo to the left shows a crawlspace with a vapor barrier on the walls and floor.  

Some companies will extoll the virtues of a conditioned crawlspace, meaning HVAC vents in the space are open to heat and cool the space.   Not a huge fan of conditioned crawl spaces since you are heating and cooling an area that is not habitable. 


insulating a crawl space

The photo to the right is another crawlspace, which had a concrete floor;  no vapor barrier was needed.  The walls were insulated with foam board, and the outside vents were sealed.  This is a much cheaper approach, but really,  it could have been a $100 fix by just sealing the vents.  Here is what you do not see but should visualize:  that there is zero mold in this space, nor was there ever; the owner told me so as they paid for the insulation on the walls.  They are elderly, and they said they were told it was dangerous not to do the insulating - scammed. 

Crawlspaces are neglected because they are not humanly accessible, and no one in your household is checking the crawlspace on a regular basis.  If mold exists below, you will be exposed to it above.
 
I am a fan of making improvements, such as moisture control, and operating a dehumidifier in a crawl space.  Do you know who loves moisture?   Mold, termites, and insects thrive on moisture, and you get rid of all three.  I feel the professional crawlspace companies oversell the products.  I find this from the inspection we do, and we do thousands.    Many elderly people get crawlspace encapsulation, then pay for annual inspections, and yes, the inspections find issues that need maintenance.   Just did an inspection, and they wanted $620 in maintenance, and no, it was not a new dehumidifier; it was vacuuming up dead insects, rehanging insulation, and reattaching the poly sheeting that came off a wall. I taped the wall and rehung the insulation, no charge.  I couldn't see any dead insects requiring vacuuming.

Want professional advice on a crawlspace? Call Curren.

 Questions? 888-301-1050

Read More

Top 10 Things You Cannot Recycle & How to Recycle Properly

Jan 5, 2026 11:00:00 AM / by David C Sulock

0 Comments

How can you recycle like you mean it? Let's start with the top ten things you "cannot" recycle. 

  1. Plastic Bags.  You may be able to bring them to your supermarket
  2.  Items the size of a credit card, such as straws, plastic utensils, coffee pods, and credit cards.
  3. Dirty food containers. General rule: if you cannot clean it before recycling it, you can't recycle it.  Food boxes impacted with food are an absolute no.   Dirty ketchup bottles are a no as well.
  4. Plastic-coated paper, such as the interior coating of a coffee cup, is used to make the paper stronger. 
  5. Plastics that are numbers 1 & 2 are the gold standard of recycling, yes. If you do not know what that means, go look at the number on the bottom of your detergent bottle, if the number doesn’t match with your local recycling program, it’s not recyclable.  

Pro Tip: Plastics with #4, #5, and #7 were recycled before 2018.

The recycling of these particular plastic containers was largely dependent on markets outside the USA. In 2018, China, which received most of these plastics, implemented a policy known as the National Sword. This resulted in greater restrictions on the importation of recyclables of any kind. Markets for #4, #5, and #7 plastics are now almost non-existent.

  1. Plastic film, or bubble wrap, is a no.
  2. Clothing hangers, metal or plastic
  3. Ice cream containers
  4. Styrofoam, but you already knew that.
  5. Windows and mirrors

How to Recycle Properly

If there is one thing I have learned is that people do not know how to recycle properly. Working in an environmental company, all I have to do is look into the multiple blue recycling cans located in every room of our office and see where recycling efforts are failing.

Let’s start with the history of recycling. People had to be trained to recycle, so centers were established and programs implemented to create local recycling programs. Since facilities were not just built and waiting for materials, many early recycling collections sent the material to landfills. This was part of training people to recycle instead of throwing recyclable materials in the trash, even if the recycling went to a landfill.

To make you feel better, paper has been recycled for decades, and initially, trucking containers were dropped in shopping centers and central areas in populated areas where you could drive your newspapers (yep, dating myself here with newspapers), bottles,  and aluminum cans where you placed them in designated areas for pickup and transportation to recycling centers. Heck, cans and bottles in some states had 5-cent and 10-cent deposits that you could reclaim when you brought your cans and bottles to designated recycling centers.

All these end-user labor-intensive recycling operations were replaced with home and business pickup of recycled material. Initially, you had to segregate plastic from glass, bottles from paper, and then Single Stream Recycling was implemented, which allowed you to place all your recyclables in one container to be sorted at the recycling facility. This simplified approach to recycling created optimism never before seen in recycling and created a term called Wish Cycling. Meaning items that no one ever said were recyclable were considered recyclable by consumers and thrown into the single-stream bin. Items seen include ceramic coffee cups, leaded wine glasses, Nerf footballs, and of course, used pizza boxes.  None of these are actually recyclable under current programs and end up being segregated and landfilled. Food-impacted containers paper or peanut butter containers, are also not recyclable. Used pizza box no way.

What can you recycle?

Newspapers, magazines, junk mail with no cellophane window, cardboard boxes

  • Plastic water bottles
  • Beer bottles and cans
  • Clean food containers

Pro Tip

When in doubt, throw it out.

Google your local recycling program, which will list what can and cannot be recycled.


Read More

Environmental Due Diligence for Multi-Tenant Commercial Space Purchase

Nov 3, 2025 12:30:00 PM / by David C Sulock posted in Phase I, AAI All Appropriate Inquiries, Phase II, Phase II Costs

0 Comments

The commercial real estate market offers a wide variety of properties that can host multiple tenants, creating multiple streams of income for landlords. Many of these spaces are flex spaces, which may include offices, light industrial operations, or warehousing. While this versatility is appealing, it also brings a higher potential for environmental complications compared to single-tenant office buildings.

A typical multi-tenant property could include tenants such as:

  • A satellite sales office
  • A solar installation company
  • A gymnastic studio
  • A light manufacturing business

Of these tenants, most could pose environmental risks. For example:

  • Sales offices may store demo products, damaged or expired items, or cleaning compounds.
  • Installation companies could store energy products or panels containing hazardous materials.
  • Manufacturers often produce waste products that, in states like New Jersey, may fall under regulations such as ISRA (Industrial Site Recovery Act), requiring an environmental audit when the property is sold or transferred.


Environmental Due Diligence for Multi-Tenant Commercial Space Purchase

Even if a tenant who caused an issue has moved out, landlords remain legally responsible for environmental compliance. For example, one landlord recently paid $12,000 to complete an ISRA audit, while others have faced costs exceeding $100,000.


In another case, a property had 16 inches of environmental reports prepared for a buyer, but part of the property was still undergoing remediation. The seller had assumed the property was cleared based on prior reports. Pro tip: if you see references to the EPA, it’s usually a state agency like NJDEP, not the federal EPA—but it still signals a significant environmental concern.


These scenarios highlight why thorough environmIMG_3955ental due diligence is critical for multi-tenant properties. A Phase I Environmental Site Assessment (ESA) is always the starting point, though the typical 2–3 week turnaround may be too fast for complex sites. In many cases, a Phase II ESA is also warranted, especially for older buildings or properties with tenants who may have generated hazardous waste.

We recently worked on a property where cleanup from a current tenant was ongoing, with remediation expected to last another 18 months. The buyer’s lender ultimately declined financing due to the extended remediation period—underscoring the higher failure rate of transactions in multi-tenant spaces due to environmental factors.

📞888-301-1050

Phase I Due Diligence


Read More

Subscribe to Email Updates

Lists by Topic

see all

Posts by Topic

see all

Recent Posts